Seed Drawings: How Seeds Sprout! (Visual Guide)
The fascinating world of botany offers endless opportunities for discovery, and understanding how seeds sprout is a fundamental concept. Consider the USDA, a vital organization providing resources on plant biology. Visual learning, enhanced by the power of diagrams, is particularly useful when exploring this topic. Even the renowned botanist, Jane Colden, meticulously documented plant life through illustrations, highlighting the importance of visual representation. If you’re asking yourself, “show me a drawing of a seed,” then you’re in the right place! This guide uses visual aids to illuminate the incredible process of germination.
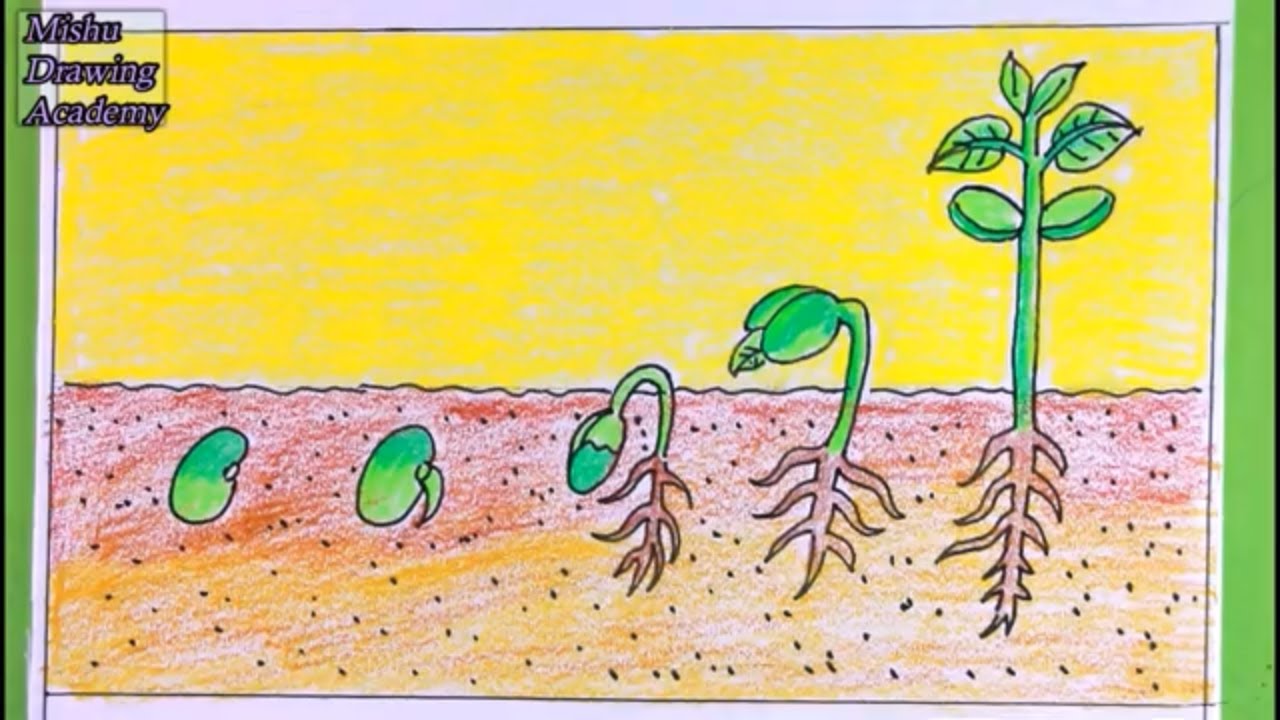
Image taken from the YouTube channel Mishu Drawing Academy , from the video titled How TO Draw Seed Germination/Draw Sprouted Seeds Easy .
Deconstructing "Seed Drawings: How Seeds Sprout! (Visual Guide)" – A Layout for Maximum Impact
This guide explores how to best structure your article about seed sprouting, ensuring it’s both informative and visually appealing, especially when targeting the search term "show me a drawing of a seed". The key is to seamlessly blend textual explanation with clear and engaging visuals.
I. Introduction: Hooking the Reader with Seeds
- Opening Paragraph: Start with a captivating question or relatable scenario. For example: "Ever wondered what’s happening inside that tiny seed you planted? It’s a miniature miracle of life unfolding!"
- Introduce the Topic: Briefly explain what the article will cover – the process of seed germination, focusing on visual representation. Explicitly mention drawings and illustrations.
- Importance of Seeds: Touch upon why seeds are important to the ecosystem and human life (food source, plant reproduction, etc.).
- Keyword Integration: Naturally incorporate "show me a drawing of a seed" in a contextually relevant sentence. For instance: "If you’ve ever asked yourself ‘show me a drawing of a seed’ to better understand its parts, you’ve come to the right place! We’ll explore seed anatomy through detailed illustrations."
- Visual Aid: Include a visually striking image here. This could be a collage of different types of seeds, or a simple drawing of a seed.
II. The Anatomy of a Seed: Visual Breakdown
-
Headline Focus: Directly addresses the "show me a drawing of a seed" query.
-
Main Illustration: This is the cornerstone of this section. Feature a detailed, labeled drawing of a generic seed (dicot or monocot, depending on your target audience – specify which if it’s one). Key components to label:
- Seed Coat (Testa)
- Embryo (Radicle, Plumule, Cotyledon(s))
- Endosperm (if present)
-
Table of Seed Parts and Functions:
Seed Part Function Seed Coat Protects the embryo from damage and drying out Embryo The baby plant, containing the radicle and plumule Radicle Develops into the root of the plant Plumule Develops into the stem and leaves of the plant Cotyledon(s) Provides food for the developing embryo Endosperm Food storage tissue (not always present) -
Detailed Explanation of Each Part:
2.1. Seed Coat
- Explanation of its protective role.
- Different types of seed coats (hard, soft, etc.)
- Visual examples (photos of seeds with different coat textures).
2.2. Embryo
- Explain the embryo as a miniature plant.
- Differentiate between radicle and plumule.
- Diagram illustrating the development of radicle into root.
2.3. Cotyledons
- Explain the role of cotyledons in providing nourishment.
- Differentiate between monocots and dicots (single vs. double cotyledons) using illustrations. A comparative drawing is helpful here.
III. The Germination Process: A Step-by-Step Visual Guide
-
Introduction: Transition smoothly from seed anatomy to the process of sprouting.
-
Factors Affecting Germination:
- Water
- Temperature
- Oxygen
- Light (for some seeds)
- Explain how each factor plays a role.
-
Numbered Steps with Illustrations: This is crucial for the "visual guide" aspect. Each step should be accompanied by a clear drawing illustrating the stage.
- Imbibition (Water Absorption): Illustration showing the seed swelling as it absorbs water.
- Activation of Enzymes: Explanation of the biochemical processes occurring inside the seed. A simple diagram showing enzyme activity can be included.
- Radicle Emergence: Drawing depicting the radicle breaking through the seed coat.
- Root Development: Illustration showing the radicle growing and forming roots.
- Plumule Emergence: Drawing depicting the plumule pushing upwards towards the light.
- Cotyledon Development (if applicable): Illustration showing the cotyledons unfolding and providing initial energy.
- True Leaf Development: Illustration showing the first true leaves emerging.
-
Each step should have a brief, easy-to-understand explanation.
-
Use arrows and annotations on the drawings to highlight key changes.
IV. Types of Germination: Visual Comparison
- Epigeal Germination:
- Explanation: Cotyledons are pushed above the soil surface.
- Illustration: Clear drawing of epigeal germination with labeled parts (cotyledons, hypocotyl, radicle).
- Hypogeal Germination:
- Explanation: Cotyledons remain underground.
- Illustration: Clear drawing of hypogeal germination with labeled parts (cotyledons, epicotyl, radicle).
- Comparative Table and/or Drawing: A table or drawing comparing epigeal and hypogeal germination can be extremely helpful in highlighting the differences.
V. Common Seed Problems and Solutions: Visual Diagnosis
- Problem 1: Seed Doesn’t Germinate:
- Possible Causes: Old seeds, improper watering, incorrect temperature.
- Visual: A withered seed or a pot with no sprouts.
- Solutions: Check seed viability, ensure proper watering and temperature.
- Problem 2: Mold Growth:
- Possible Causes: Overwatering, poor drainage.
- Visual: A seed with visible mold growth.
- Solutions: Improve drainage, reduce watering frequency.
- Problem 3: Leggy Seedlings:
- Possible Causes: Insufficient light.
- Visual: Tall, thin seedlings stretching towards light.
- Solutions: Provide more light or move seedlings closer to a light source.
- Each problem should be accompanied by a visual and corresponding solutions.
This structure provides a comprehensive and visually engaging guide to seed germination, directly addressing the query "show me a drawing of a seed" throughout the article. By combining clear explanations with detailed illustrations, you can create a resource that is both informative and enjoyable to read.
Seed Sprout FAQ
Here are some frequently asked questions about seed germination, illustrated in our visual guide.
What exactly is germination?
Germination is the process where a seed begins to grow and develop into a young plant. This happens when the seed finds the right conditions, like water, warmth, and sometimes light. Show me a drawing of a seed and you’ll see all the parts ready to spring into action!
What are the basic needs for a seed to sprout?
Seeds need moisture to soften their outer shell and activate internal processes. They also need warmth, usually a moderate temperature specific to the seed type. Finally, some seeds require light to trigger germination.
How long does it take for a seed to germinate?
Germination time varies greatly! Some seeds sprout within days, while others can take weeks or even months. Factors like seed type, temperature, and moisture levels all play a role.
What part of the seed grows first?
Typically, the radicle, which is the embryonic root, emerges first. This anchors the seedling and starts absorbing water and nutrients from the soil. If you show me a drawing of a seed, the radicle is usually the pointed end that’s ready to push out.
So, next time you see a tiny sprout, remember the amazing journey it’s been on! We hope this visual guide sparked your curiosity about seeds, and that answering the question “show me a drawing of a seed” helped you understand. Happy growing!
