5 Secrets to Insulating Your Home with Styrofoam? Save Money Now!
Are you tired of watching your hard-earned money disappear with every monthly energy bill? For homeowners across the United States, the battle against rising heating and cooling costs is a constant challenge. But what if there was a powerful, yet accessible, secret weapon to not only slash those expenses but also transform your home into a beacon of year-round comfort?
Enter Heat Insulation Styrofoam, also known as Polystyrene Foam – your ultimate ally in achieving superior Home Energy Efficiency. This incredible material works tirelessly to keep your home warmer in the winter and delightfully cooler in the summer, directly boosting your HVAC System Efficiency and putting more money back in your pocket.
Ready to unlock a more comfortable home and significant Cost Savings? We’re about to reveal the 5 crucial secrets that will provide a practical roadmap to confidently selecting, installing, and maximizing the benefits of styrofoam insulation, empowering you to take control of your home’s energy future today!
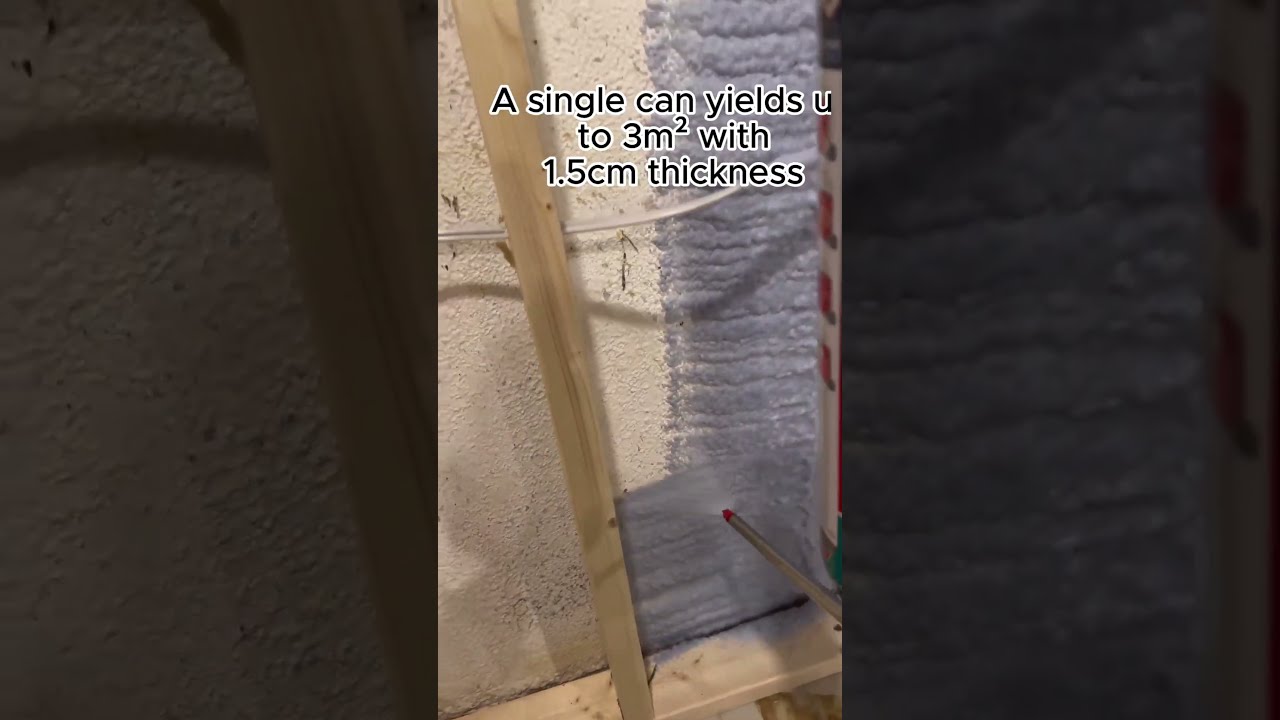
Image taken from the YouTube channel Master Building Materials , from the video titled Akfix Thermcoat Thermal & Acoustic Insulation Pu Spray Foam .
For many homeowners across the United States, the rising cost of keeping a comfortable home has become a persistent challenge.
The Invisible Shield: How Styrofoam Can Slash Your Energy Bills and Transform Your Home
The relentless increase in utility costs can make maintaining a comfortable indoor environment feel like a constant battle. From sweltering summers that demand continuous air conditioning to frigid winters requiring the furnace to run non-stop, these fluctuating temperatures translate directly into higher energy bills. This struggle isn’t just about money; it’s about comfort, peace of mind, and the environmental impact of inefficient energy consumption.
Introducing Your Ally: Heat Insulation Styrofoam (Polystyrene Foam)
But what if there was an accessible, powerful solution to this widespread problem? Enter Heat Insulation Styrofoam, also widely known as Polystyrene Foam. This versatile material is not just for packing peanuts; it’s a game-changer for improving Home Energy Efficiency. By creating a robust barrier against the elements, styrofoam insulation helps regulate your home’s internal temperature, making it a powerful and surprisingly simple upgrade for any homeowner looking to take control of their energy costs.
The Science of Comfort: How Insulation Works Its Magic
At its core, proper insulation works by significantly reducing heat transfer between your home’s interior and the outside world. Think of it like a high-performance thermos for your house.
- In the winter, heat naturally tries to escape from your warm indoor spaces to the colder outdoors. Insulation acts as a thermal barrier, slowing this heat loss down considerably. This means your heating system doesn’t have to work as hard or as often to maintain your desired temperature.
- In the summer, the reverse is true. Hot air from outside tries to penetrate your cooler home. Insulation resists this incoming heat, keeping your conditioned air inside where it belongs. Your air conditioning system can then run more efficiently, cycling less frequently and using less energy.
The direct result of this improved thermal regulation is a significant boost in your HVAC System Efficiency. When your heating, ventilation, and air conditioning systems don’t have to constantly battle against heat loss or gain, they consume less energy, experience less wear and tear, and ultimately save you money on those monthly bills. It’s a win-win: a more comfortable home environment with lower operating costs.
Your Practical Roadmap to Energy Savings
Understanding the "why" is just the beginning. To truly harness the power of styrofoam insulation, you need a practical roadmap—a clear guide on how to choose the right materials, install them effectively, and maximize their benefits. We’ve compiled "5 Secrets" that will provide just that. These insights are designed to arm you with the knowledge you need to transform your home’s energy performance.
Ready to delve deeper into these practical solutions? Our first secret will uncover the crucial differences between insulation types.
When it comes to harnessing the power of heat insulation styrofoam for significant cost savings, understanding its nuances is your first step towards success.
Your Insulation’s Unsung Hero: Why Choosing the Right Polystyrene Foam is Non-Negotiable
Not all polystyrene foam is created equal, and mistaking one type for another can significantly impact the effectiveness and longevity of your DIY home insulation project. Polystyrene foam, a remarkably versatile material, primarily comes in two distinct forms: Expanded Polystyrene (EPS) and Extruded Polystyrene (XPS). Recognizing their differences and knowing when to use each is absolutely critical for achieving the best possible results and maximizing your energy savings.
Expanded Polystyrene (EPS): The Cost-Effective Champion
You’re likely already familiar with Expanded Polystyrene (EPS) foam, even if you don’t know it by name. It’s the material commonly used for disposable coffee cups, packaging peanuts, and those lightweight coolers. When you look closely at EPS, you’ll notice its characteristic beaded, open-cell structure, almost like many tiny, fused foam balls.
Key Features & Benefits of EPS:
- Appearance: Distinctive beaded look, visible small air pockets.
- Structure: Open-cell foam, which means it can absorb some moisture if exposed.
- Cost-Effectiveness: Generally the most budget-friendly option, making it a popular choice for large-scale projects or areas where moisture isn’t a primary concern.
- Common Applications:
- Wall Cavities: Excellent for insulating between studs in walls.
- Roof Insulation: Often used as a lightweight board for flat and sloped roofs.
- Attics: Can be cut and fitted into attic spaces.
- Below-grade Insulation (limited): Can be used, but generally not preferred for direct soil contact due due to moisture absorption.
Extruded Polystyrene (XPS): The Moisture-Resistant Powerhouse
Extruded Polystyrene (XPS) foam, on the other hand, is a step up in terms of performance and density. You’ll recognize it by its distinctive color, often pink, blue, or green, and its remarkably smooth, dense surface. Unlike EPS, XPS boasts a closed-cell structure, which is key to its superior properties.
Key Features & Benefits of XPS:
- Appearance: Smooth, dense, uniform surface; typically comes in distinct colors like pink, blue, or green.
- Structure: Closed-cell foam, meaning it resists water absorption much more effectively than EPS.
- Superior Moisture Resistance: This is its standout feature, making it highly durable in damp or wet environments.
- Higher R-value: XPS generally offers a slightly higher R-value (a measure of thermal resistance) per inch compared to EPS, meaning it provides more insulating power for the same thickness.
- Higher Compressive Strength: It’s denser and more rigid, making it better for applications where it might bear weight.
- Ideal Applications:
- Basements: Perfect for insulating basement walls, both interior and exterior, where moisture is a constant threat.
- Foundations: Excellent for insulating foundation walls and under concrete slabs, protecting against ground moisture and temperature fluctuations.
- Exterior Walls (Sheathing): Often used as an exterior sheathing layer to add insulation and create a thermal break.
Making the Smart Choice: EPS vs. XPS for Your DIY Project
Choosing between EPS and XPS comes down to balancing your budget, the specific location of your insulation, and the environmental conditions it will face.
| Feature | Expanded Polystyrene (EPS) | Extruded Polystyrene (XPS) |
|---|---|---|
| Appearance | Beaded, often white, visible fused foam balls | Smooth, dense, uniform surface; typically pink, blue, green |
| Structure | Open-cell | Closed-cell |
| Moisture Resistance | Good, but can absorb moisture over time | Excellent, highly resistant to water absorption |
| R-value (per inch) | ~3.6 – 4.2 | ~4.8 – 5.0 |
| Cost | Generally lower | Generally higher |
| Compressive Strength | Good | Excellent |
| Typical Applications | Wall cavities, roof insulation, attic spaces, general packaging | Basement walls, foundations, under concrete slabs, exterior sheathing |
When to Use EPS:
- Interior Wall Cavities: Ideal for insulating between studs in above-grade walls where direct moisture exposure is minimal.
- Attics & Roofs: A cost-effective solution for adding insulation to attics or as part of a roof insulation system.
- Budget-Conscious Projects: When you need good insulation performance without breaking the bank, and conditions are relatively dry.
When to Use XPS:
- Basements & Foundations: Your go-to choice for any insulation below grade, against concrete, or where ground moisture is a factor. Its superior moisture resistance is invaluable here.
- Exterior Wall Sheathing: Provides an excellent thermal break and additional insulation on the exterior of your home, helping to prevent thermal bridging through studs.
- High-Humidity Areas: If you’re insulating in areas prone to condensation or higher humidity, XPS offers better long-term performance.
By carefully considering the specific needs of each part of your home insulation project, you can strategically deploy either EPS or XPS to achieve not just insulation, but optimal insulation, ensuring efficiency and durability.
Once you’ve made your selection, the next crucial step is ensuring that your chosen insulation is installed correctly to unlock its full potential.
Once you’ve wisely selected the right insulation material for your project, the next crucial step determines whether all that effort pays off.
From Board to Barrier: Your Master Class in Flawless Insulation Installation
Even the most advanced insulation material is only as effective as its installation. Think of it like a chain: a single weak link can compromise the entire structure. If your insulation is poorly fitted, riddled with gaps, or improperly sealed, you’re essentially leaving your home’s thermal defenses wide open. This not only wastes the money you spent on quality materials but also defeats the purpose of insulating in the first place, leading to continued energy loss and uncomfortable drafts. Proper Insulation Installation isn’t just a suggestion; it’s the bedrock of energy efficiency and indoor comfort.
Why Precision Matters for Your DIY Home Insulation
When insulating, your primary goal is to create a continuous thermal barrier that blocks heat transfer and, crucially, air movement. Air leaks can undermine even the highest R-value insulation, allowing conditioned air to escape and unconditioned air to infiltrate. This is why techniques like accurate measuring, precise cutting, creating a snug fit, and meticulous sealing are absolutely non-negotiable for a successful DIY Home Insulation project. Let’s walk through a common scenario: insulating your basement walls with foam boards.
Your Step-by-Step Guide: Insulating Basement Walls
This guide focuses on installing rigid foam boards (like EPS or XPS) against existing basement walls, a common and effective DIY Home Insulation upgrade.
Prepare Your Battlefield
- Clear and Clean: Remove any debris, old insulation, or loose paint from the basement walls. Ensure the surface is as clean and dry as possible. Address any moisture issues before insulating, as trapping moisture can lead to mold and rot.
- Obstacle Awareness: Note the location of electrical outlets, pipes, and windows. You’ll need to work around these.
Gather Your Arsenal (Tools & Safety)
Before you begin, ensure you have the right gear. Safety first!
- Safety Gear:
- Gloves: Protect your hands from cuts and irritants.
- Safety Glasses: Essential to shield your eyes from debris.
- Dust Mask/Respirator: To avoid inhaling insulation particles or dust, especially when cutting.
- Essential Tools:
- Utility Knife or Insulation Saw: For clean, precise cuts on foam boards. A long, serrated utility knife works well for foam.
- Tape Measure: For accurate dimensions.
- Straight Edge or T-square: To guide your cuts for straight lines.
- Construction Adhesive or Fasteners: To secure foam boards to the wall (check product recommendations for compatibility with your wall type).
- Insulation Tape or Acoustical Sealant/Caulk: Specialized, airtight tape (like foil tape or housewrap tape) or low-expansion spray foam/caulk designed for sealing seams.
- Pencil/Marker: For marking measurements.
- Caulk Gun: If using sealant.
- Small Pry Bar/Scraper: For minor adjustments or removing old materials.
Measure and Cut with Surgical Precision
- Measure Twice, Cut Once: Measure the height and width of each wall section where insulation will be installed. For areas around windows, doors, or electrical boxes, measure the opening dimensions carefully.
- Transfer Marks Accurately: Lay your foam board on a flat, stable surface. Use your tape measure, pencil, and straight edge to mark your cut lines precisely.
- The Clean Cut: Using your utility knife or insulation saw, make a smooth, steady cut along your marked line. For thicker boards, you might need to score deeply and then snap, or make several passes. For outlets or irregularly shaped obstacles, you might need to trace the shape onto the foam board and cut it out meticulously. A keyhole saw can be useful for internal cuts.
Achieve the Snug Fit
- Gap Prevention is Key: This is where many DIYers falter. Each foam board should fit snugly against its neighbors and against the wall, leaving no visible gaps. Even small gaps can allow air to bypass your insulation, creating cold spots and reducing efficiency.
- Work from the Bottom Up: Typically, you’ll start at the bottom of the wall, placing the first row of boards. Apply construction adhesive to the back of the board in a wavy pattern, or use appropriate fasteners as per manufacturer instructions. Press firmly against the wall.
- Interlocking Edges: If your foam boards have tongue-and-groove or shiplap edges, ensure they interlock properly for an even tighter fit. If not, just butt them tightly together.
Seal Every Seam
- The Air Barrier Imperative: Once all the boards are in place, the real magic of professional installation begins: sealing. This step is critical for preventing air leakage and creating a true thermal barrier.
- Tape or Caulk:
- Specialized Insulation Tape: Apply a continuous strip of specialized, airtight tape (e.g., housewrap tape, foil tape) over every seam where two foam boards meet. Overlap the tape edges for a secure seal. Ensure it adheres firmly to both boards.
- Acoustical Sealant/Caulk/Low-Expansion Foam: Use a bead of acoustical sealant, caulk, or low-expansion spray foam along all edges where the foam boards meet the floor, ceiling, or any framing. Also, fill any unavoidable gaps, small holes, or cut-outs around outlets and pipes with low-expansion foam or caulk. Be careful with spray foam; "low-expansion" is important to avoid bowing the foam board.
Finishing Touches (Optional but Recommended)
- Vapor Barrier: Depending on your climate and local building codes, you might need to install a separate vapor barrier over the foam boards, particularly in basements.
- Fire Protection: Foam boards are often required to be covered with a fire-rated material like drywall (gypsum board) for safety and code compliance.
Following these steps for your DIY Home Insulation ensures you’re not just adding material, but creating a truly effective, air-sealed thermal barrier.
Essential Tools & Safety Gear Checklist
For a successful and safe DIY Home Insulation job:
- Safety Glasses
- Gloves
- Dust Mask / Respirator
- Utility Knife (with spare blades)
- Tape Measure
- Straight Edge / T-Square
- Pencil / Marker
- Construction Adhesive (foam board compatible)
- Caulk Gun
- Specialized Insulation Tape (e.g., foil, housewrap)
- Low-Expansion Spray Foam / Acoustical Sealant
- Cleaning supplies (e.g., broom, rag)
- Drop cloths (optional, for floor protection)
With your insulation perfectly installed, you’re ready to unlock the full potential of its thermal resistance.
Once you’ve mastered the hands-on techniques for flawless insulation installation, it’s time to understand the science behind true thermal efficiency.
Secret #3: Unlocking the Invisible Shield: Mastering R-Value for True Thermal Performance and Savings
Imagine your home wrapped in an invisible shield, deflecting the scorching summer heat and trapping cozy winter warmth. That’s the power of good insulation, and its effectiveness is measured by a crucial term: R-value. Understanding this concept isn’t just for professionals; it’s your blueprint for a more comfortable home and significant cost savings on energy bills.
What is R-Value, Really? Demystifying the Core Concept
At its heart, R-value is a measurement of an insulation material’s ability to resist heat flow. The "R" stands for "resistance." Think of it this way: heat naturally wants to move from warmer areas to colder areas – from your warm house to the cold outdoors in winter, or from the hot outdoors into your cool house in summer. Insulation’s job is to slow down or resist this movement.
The simple rule to remember is: a higher R-value means better insulation and greater resistance to heat flow. This directly translates into a more stable indoor temperature, less work for your HVAC system, and ultimately, greater cost savings on your energy bills year after year.
R-Value by Insulation Type: EPS vs. XPS
Different insulation materials offer varying R-values per inch of thickness. When making informed decisions, it’s helpful to know the typical values for common rigid foam insulation types:
- EPS (Expanded Polystyrene): Often referred to as beadboard, EPS typically offers an R-value of around R-3.8 to R-4.0 per inch. It’s a versatile, cost-effective option commonly used in various applications, including exterior sheathing and under-slab insulation.
- XPS (Extruded Polystyrene): Recognizable by its distinct blue, pink, or green color, XPS boasts a slightly higher R-value of around R-5.0 per inch. Its closed-cell structure makes it more resistant to moisture, making it a popular choice for foundations, basements, and other areas where moisture exposure is a concern.
Knowing these numbers helps you compare materials and calculate the total R-value needed for a specific thickness.
Tailoring R-Values to Your Home and Climate Zone
Simply knowing what R-value is isn’t enough; you need to know what R-value is right for your home. Insulation needs vary significantly based on where you live and which part of your home you’re insulating. The United States Department of Energy (DOE) provides excellent recommendations to guide homeowners.
When planning your insulation project, you’ll want to:
- Identify Your Climate Zone: The U.S. is divided into several climate zones, each with different heating and cooling demands. You can usually find your zone on a map provided by the DOE.
- Consider the Area of Your Home: Different parts of your home have different R-value requirements:
- Attics: Typically require the highest R-values due to direct exposure to outdoor temperatures.
- Walls: R-values depend on the framing (e.g., 2×4 vs. 2×6 studs) and whether exterior continuous insulation is used.
- Floors (above unheated spaces): Essential for preventing heat loss to crawl spaces or basements.
- Foundations/Basement Walls: Important for preventing heat transfer through the ground.
Consulting these recommendations ensures your insulation is adequately protecting your home from the elements specific to your region.
Recommended R-Values by Climate Zone and Home Area
To help illustrate these guidelines, here’s a general table showing recommended R-values for different areas of a home in three example U.S. climate zones. Keep in mind these are general recommendations, and local conditions or specific building designs might require adjustments.
| Home Area | Northern Climate (e.g., Zone 6-8) | Central Climate (e.g., Zone 4-5) | Southern Climate (e.g., Zone 1-3) |
|---|---|---|---|
| Attic | R-49 to R-60+ | R-38 to R-49 | R-30 to R-38 |
| 2×4 Walls | R-13 to R-15 (Cavity) | R-13 (Cavity) | R-13 (Cavity) |
| Foundation | R-15 to R-19 | R-10 to R-13 | R-5 to R-10 |
| (Basement/Crawl) |
Note: "2×4 Walls" values typically refer to insulation within the stud cavity. Adding continuous exterior insulation significantly increases the overall wall R-value.
Armed with this knowledge of R-value, your next step is to ensure your project not only performs well but also meets all necessary regulations.
While understanding R-values helps you build an efficient thermal envelope, there’s another critical layer of protection you absolutely cannot overlook for any home improvement project, especially insulation:
Beyond the R-Value: Unlocking the Safety Secrets of Building Codes
Think of building codes not as optional suggestions, but as the foundational rulebook for safe, sound, and compliant construction. These regulations are non-negotiable and are in place to protect you, your family, and your community. Neglecting them in your insulation project could lead to significant issues, from safety hazards to costly rework and even difficulties when you eventually sell your home.
The Mandate for Foam Insulation: Understanding Thermal Barriers
Polystyrene foam insulations, such as Expanded Polystyrene (EPS) and Extruded Polystyrene (XPS), are incredibly effective at improving a home’s thermal performance. However, due to their inherent flammability when exposed, building codes across the United States have strict requirements for their installation, particularly in occupied spaces.
The most common and crucial code requirement for polystyrene foam, when installed in areas like basements, living spaces, or attached garages, is the need for a thermal or ignition barrier. This barrier acts as a protective shield, delaying the foam’s exposure to fire. The go-to solution for this barrier is typically 1/2-inch drywall (gypsum board). It provides a proven level of fire resistance, giving occupants critical time to evacuate in case of a fire. Other approved materials, such as specific cement boards or fire-rated panels, might also be permitted, but always check your local regulations.
- Key takeaway: If you’re using polystyrene foam insulation in any part of your home where people live or could be present, expect to cover it with an approved barrier like drywall.
Your Local Blueprint: How to Find and Understand Building Codes
Navigating building regulations might seem daunting, but finding the information relevant to your home improvement project is usually straightforward. For homeowners in the United States, your journey begins at the local level:
- Start with Your Local Government: Your first and best resource is your city or county government’s official website.
- Look for Key Departments: Search for sections dedicated to the "Building Department," "Planning & Zoning," "Permits," or "Codes & Ordinances."
- Identify Residential Codes: Most jurisdictions adopt a version of the International Residential Code (IRC) for one- and two-family dwellings, often with local amendments. Look for chapters or sections pertaining to "Insulation," "Fire-Resistive Construction," or "Materials."
- Don’t Hesitate to Call: If you find the online information overwhelming or have specific questions about your project, do not hesitate to contact your local building department directly. They are there to help ensure compliance and can often clarify confusing passages or point you to the exact regulations that apply to your situation. Many departments also offer downloadable guides, checklists, or FAQs tailored for homeowners.
- Consider Professionals: If your project is extensive or involves complex systems, consulting with a licensed contractor or architect who is familiar with local codes can provide invaluable peace of mind.
The Unseen Returns: Safety and Value as Your Rewards
Beyond merely avoiding penalties, adhering to building codes is fundamentally about ensuring the well-being of your family and protecting your investment. Codes are meticulously crafted by experts to prevent hazards such as fires, structural failures, and other risks that could arise from improper construction or material usage. An improperly installed insulation system, especially one not conforming to fire safety standards, could turn a hidden asset into a hidden danger.
Furthermore, a code-compliant home is a valuable home. Should you ever decide to sell, having documented proof of code adherence (via permits and inspections) can streamline the sale process and increase buyer confidence. Conversely, code violations can lead to costly remediation requirements, complicate insurance claims, and significantly devalue your property. Following the rules isn’t just about ticking boxes; it’s about building a safer, more resilient home that holds its worth.
Once your insulation project is safely and compliantly installed, you’ll be ready to measure its real-world impact and track your savings.
While understanding building codes is crucial for any home improvement project, knowing where your home is losing energy is the key to truly maximizing your investment.
Unlocking Your Home’s Hidden Treasure: The Energy Audit for Maximum Savings
Imagine having a secret map that pinpoints exactly where your home is wasting money on energy. That’s essentially what a home Energy Audit offers. It’s the ultimate diagnostic tool designed to reveal the invisible leaks, drafts, and insulation gaps that are silently driving up your utility bills. By understanding these weaknesses, you can focus your efforts and resources on the most impactful improvements, ensuring every dollar spent on insulation translates into significant Cost Savings.
Starting Smart: Your DIY Energy Detective Work
Before you even think about hiring a professional or planning a major Insulation Installation, it’s incredibly practical to perform a simple, do-it-yourself Energy Audit. This initial detective work can help you prioritize your efforts and get a clearer picture of your home’s energy performance.
Here’s how you can get started:
- Feel for Drafts: On a windy day, carefully walk around your home. Pay close attention to windows, doors, electrical outlets, light switches, attic hatches, and where pipes or wires enter the house. Can you feel any cold air seeping in? A lit incense stick or a thin piece of tissue paper can help visualize air movement.
- Inspect Existing Insulation: If you have access to your attic, basement, or crawl space, take a look at your current insulation.
- Is it evenly distributed?
- Are there any gaps or compressed areas?
- Is it clean and dry, or is there any sign of moisture or pest damage?
- Compare its depth to recommended levels for your climate zone (often found on government energy efficiency websites).
- Check for Air Leaks Around Utilities: Look closely at penetrations in your exterior walls and ceiling, such as dryer vents, exhaust fans, and plumbing stacks. These are common culprits for air leakage.
This basic audit helps you identify the low-hanging fruit—areas where quick fixes like caulking, weatherstripping, or adding insulation in obvious gaps can make a noticeable difference.
The Proof is in the Bills: Tracking Your Savings
Once your Insulation Installation is complete, the most tangible way to measure your success is by tracking your energy bills. This before-and-after comparison provides concrete evidence of your investment’s return.
Here’s a simple guide to tracking your savings:
- Gather Historical Data: Before any insulation work begins, collect at least 12 months (or ideally 24 months) of your electricity and gas bills. This allows you to establish a baseline for your energy consumption and account for seasonal fluctuations.
- Note Down Key Metrics: For each bill, record the total cost, the amount of energy consumed (e.g., kilowatt-hours for electricity, therms or cubic feet for natural gas), and the average daily temperature for that billing period (many utility companies provide this, or you can find historical weather data online).
- Post-Installation Tracking: After your insulation project is finished, continue to track your bills for at least another 12 months using the same method.
- Compare and Calculate: Compare your energy usage and costs from the "after" period with your "before" baseline, factoring in similar temperatures. You’ll likely see a significant drop, especially during peak heating and cooling seasons. This difference is your direct Cost Savings.
By meticulously tracking these numbers, you transform an abstract concept into quantifiable financial benefits, proving the value of your insulation investment.
Beyond the Bills: Enhanced HVAC System Efficiency
The benefits of a well-insulated home extend far beyond simply lowering your monthly bills. There’s a critical connection to your home’s heating, ventilation, and air conditioning (HVAC) system.
- Reduced Workload: When your home is properly insulated, your HVAC system doesn’t have to work as hard to maintain a comfortable indoor temperature. It’s not constantly battling heat loss in winter or heat gain in summer.
- Improved Efficiency: This reduced workload means your HVAC System Efficiency naturally improves. It runs for shorter periods and less frequently, consuming less energy overall.
- Longer Lifespan: Less strain on your furnace and air conditioner components translates directly to a longer operational lifespan for your expensive equipment. This means fewer repairs and delayed replacement costs, saving you even more money in the long run.
- Enhanced Comfort: Perhaps most importantly, a well-insulated home provides more consistent temperatures throughout, eliminating hot and cold spots and significantly improving your overall comfort.
Real-World Savings: A Sample Calculation
To illustrate the potential impact, let’s look at what annual Cost Savings might look like for a typical home after a comprehensive insulation upgrade.
Potential Annual Energy Bill Savings After Insulation
| Category | Before Insulation (Annual Est.) | After Insulation (Annual Est.) | Potential Annual Savings |
|---|---|---|---|
| Home Size | 1,500 sq ft | 1,500 sq ft | – |
| Climate Zone | Mixed-Humid (Zone 4) | Mixed-Humid (Zone 4) | – |
| Heating Costs | $1,050 | $630 | $420 |
| Cooling Costs | $800 | $480 | $320 |
| Total Annual Energy Bill | $1,850 | $1,110 | $740 |
Note: Figures are estimates for a 1,500 sq ft home in a Mixed-Humid climate zone (e.g., Atlanta, GA) and can vary widely based on individual energy usage, local utility rates, and specific insulation improvements.
By understanding these tangible benefits and quantifying your success, you’re better prepared to make informed decisions for your home. With this knowledge in hand, you’re ready to move from understanding to action.
Now that you’ve uncovered the hidden energy drains and potential savings in your home with a thorough energy audit, it’s time to translate that knowledge into tangible action.
Your Home’s Energy Evolution: Turning Insulation Knowledge into Lasting Comfort and Savings
You’ve embarked on a journey towards a more efficient, comfortable, and sustainable home. Having explored the importance of an energy audit and the significant Cost Savings it can unlock, the next crucial step is to apply what you’ve learned about insulation. This section is your practical guide, consolidating the key insights from our "5 Secrets" to empower you to make informed decisions and transform your living space.
The Five Pillars of Smart Insulation: A Quick Recap
Throughout this guide, we’ve unveiled essential concepts that are foundational to any successful insulation project. Let’s briefly revisit these "secrets" to ensure you’re fully equipped to move forward:
Choosing Your Shield: EPS vs. XPS
Remember that selecting the right insulation material is paramount. We explored the distinct advantages of EPS (Expanded Polystyrene) and XPS (Extruded Polystyrene), highlighting their differences in density, R-value per inch, moisture resistance, and ideal applications. Understanding these distinctions allows you to pick the best material for your specific needs, whether it’s for exterior walls, foundations, or interior projects.
The Art of Application: Mastering Insulation Installation
Even the best insulation material won’t perform optimally if not installed correctly. We emphasized the critical importance of proper Insulation Installation, covering techniques like cutting to fit, sealing gaps, and ensuring continuous coverage. Meticulous installation prevents thermal bridging and air leaks, maximizing the effectiveness of your chosen styrofoam and delivering the intended Cost Savings and comfort.
Decoding the Degree: Understanding R-Value
The R-value is your key metric for insulation performance. This number quantifies a material’s resistance to heat flow – the higher the R-value, the better its insulating properties. We learned how to interpret R-values and select the appropriate level of insulation for different areas of your home, ensuring you achieve optimal thermal resistance for your climate zone.
Playing by the Rules: Respecting Building Codes
Safety and compliance are non-negotiable. We stressed the necessity of respecting Building Codes and local regulations. These codes dictate minimum R-values, fire safety standards, and proper installation practices, ensuring your project is not only effective but also safe and legal. Always check with your local authorities before starting any significant work.
Proving the Payoff: Measuring Your Success
Finally, we reinforced the idea of quantifying your efforts. By conducting an Energy Audit before and after your insulation improvements, you can concretely measure the reduction in energy consumption and the resulting Cost Savings. This data provides tangible proof of your success and helps you understand the return on your investment.
The Lasting Rewards of Your Efforts
Putting your insulation knowledge into action delivers far more than just a more comfortable home; it’s an investment in your future. By intelligently applying Heat Insulation Styrofoam and other techniques, you’ll unlock a trifecta of powerful, long-term benefits:
- Significant Cost Savings: Dramatically lower your energy bills year-round. Less heat escaping in winter and less cool air escaping in summer means your HVAC system works less, saving you money month after month.
- Improved Year-Round Comfort: Experience consistent indoor temperatures, eliminating drafts and hot/cold spots. Your home will feel cozier in the winter and refreshingly cool in the summer, enhancing your daily living experience.
- Reduced Carbon Footprint: By consuming less energy, you’ll decrease your reliance on fossil fuels, contributing directly to a healthier planet and a more sustainable future. This is a benefit you can feel good about.
Take the First Step: Plan Your Project Today
The knowledge is yours, and the benefits are clear. There’s never been a better time to take control of your Home Energy Efficiency. Don’t let this valuable information gather dust; instead, seize the opportunity to transform your living space.
We encourage you to take the first concrete step today: start planning your first Heat Insulation Styrofoam project. Whether it’s insulating your basement walls, upgrading your attic, or tackling an exterior renovation, identify one area where you can begin. Research local suppliers, gather quotes, or even plan a DIY weekend if you’re comfortable. The journey to a more efficient, comfortable home starts with a single step, and the rewards are well worth the effort.
Frequently Asked Questions About Heat Insulation Styrofoam
What makes styrofoam a good choice for heat insulation?
Styrofoam, due to its closed-cell structure, traps air effectively. This trapped air resists heat transfer, making it a suitable material for heat insulation styrofoam applications in homes. It’s also lightweight and relatively inexpensive.
Where can I use styrofoam for heat insulation in my home?
Styrofoam can be used in various areas, including walls, attics, and foundations. It’s versatile and can be cut to fit different spaces, providing effective heat insulation styrofoam properties wherever it’s applied.
Is styrofoam insulation environmentally friendly?
Traditional styrofoam isn’t the most environmentally friendly option, as it’s derived from petroleum. However, some manufacturers now offer recycled styrofoam options. Consider the environmental impact when selecting heat insulation styrofoam.
How does the cost of styrofoam compare to other insulation materials?
Generally, styrofoam is more affordable than many other insulation materials. This makes heat insulation styrofoam a budget-friendly option for homeowners looking to improve energy efficiency. However, consider R-value and long-term costs.
You’ve now unlocked the essential knowledge to master your home’s energy efficiency. We’ve navigated the 5 critical secrets: from understanding the vital difference between EPS and XPS, to mastering the pro’s techniques for flawless Insulation Installation. You’ve demystified the power of the R-value for true thermal performance, learned how to confidently navigate crucial Building Codes, and discovered the ultimate way to quantify your success with an Energy Audit.
The path to a more efficient and comfortable home is now clear. By implementing these practical strategies, you’re not just investing in insulation; you’re securing significant, long-term Cost Savings on your energy bills, ensuring improved year-round comfort for your family, and contributing to a reduced carbon footprint.
Don’t let another season go by paying inflated energy costs. It’s time to put your newfound knowledge into action. Take the first step towards better Home Energy Efficiency and plan your first Heat Insulation Styrofoam project today. Your wallet, and your home, will thank you!
