Secret Minecraft Tornado Command? Here’s How to Make It Fast
Have you ever desperately typed “how to make a tornado in Minecraft” into a search bar, hoping to find that one, secret Minecraft Command that would let you unleash biblical storms on your world? Let’s get one thing straight: there is no single, magic command to instantly summon a tornado.
But don’t click away just yet! While a built-in command might be a myth, the power to create your own swirling vortex of destruction is very, very real. This Tutorial is your blueprint for forging a custom Tornado from scratch in Vanilla Minecraft. We’ll guide you step-by-step through the wizardry of Command Blocks to construct the spinning core, the chaotic particle effects, and even its block-shattering power. And for those who prefer a quicker path to meteorological mayhem, we’ll also explore the incredible world of Minecraft Mods that can supercharge your world’s Weather. So, fire up your Minecraft Java Edition, and prepare to become the storm.
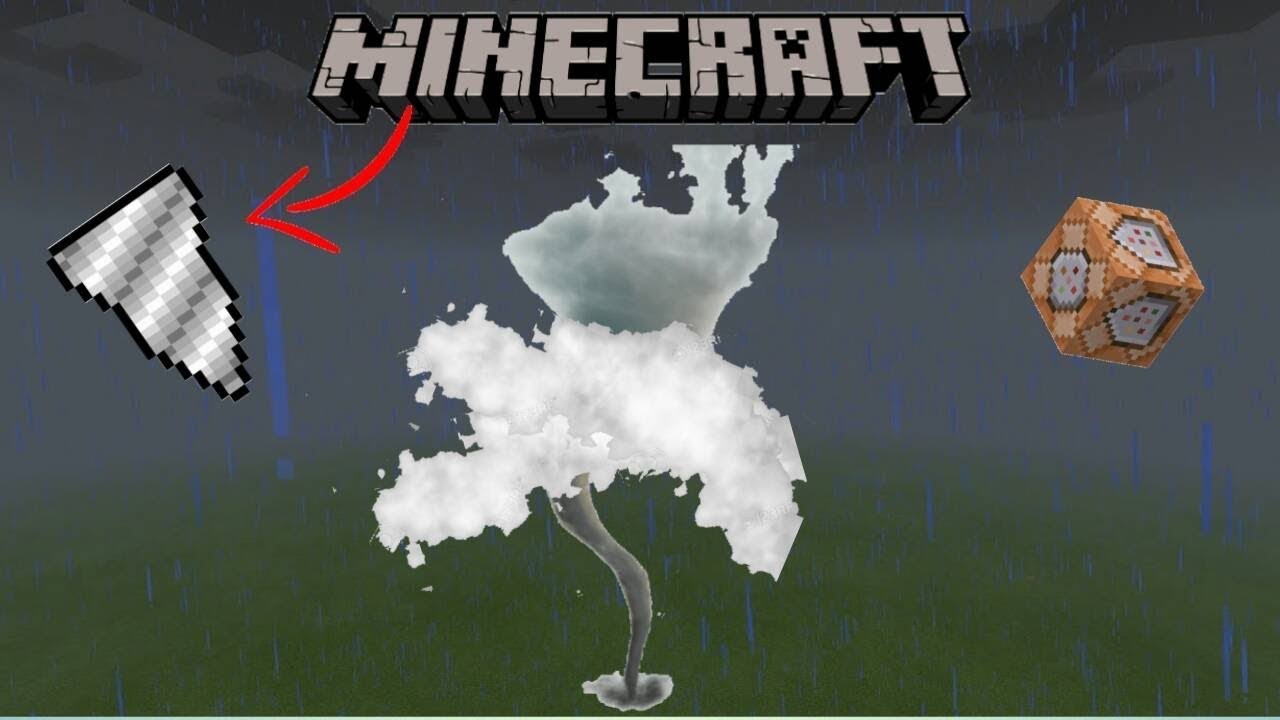
Image taken from the YouTube channel MCraft Creations , from the video titled How To Make A Tornado in Minecraft (Command Block Tutorial) .
Many a curious adventurer has scoured the digital plains of Minecraft, whispering about the possibility of a hidden, all-powerful command.
Beyond the Myth: Unleashing Your Own Minecraft Whirlwind
The rumor mill in the vast world of Minecraft often buzzes with tales of hidden commands and secret abilities. Among the most persistent is the idea of a single, magical command – perhaps something like /summon tornado or /weather devastate – that instantly conjures a terrifying, destructive whirlwind. Let’s set the record straight right from the outset: there is no single, simple Minecraft command that spawns a full-fledged, destructive tornado. The captivating image of a natural disaster tearing through your meticulously crafted world isn’t a one-line spell you can cast.
However, don’t let that initial truth dampen your spirits! While a direct command doesn’t exist, the beauty of Minecraft lies in its incredible flexibility and the ingenuity of its community. Our main goal in this tutorial is to empower you, the player, to create your very own destructive tornado effect. We’re talking about a custom-built force of nature, capable of ripping through landscapes and leaving a trail of blocky chaos, all achievable within the game.
Charting Your Course to Catastrophe: Two Main Approaches
When it comes to conjuring a simulated tornado, you essentially have two distinct routes, each offering its own flavor of creative control and immersive experience:
- The Command Blocks Method (for the Purists): This is where the true magic of Vanilla Minecraft comes alive. By chaining together intricate sequences of commands within Command Blocks, you can program complex behaviors, particle effects, and destructive capabilities that mimic a tornado. This approach is highly rewarding, offering immense satisfaction from building a complex system from scratch, and it doesn’t require any external files. It’s the ultimate test of your in-game scripting prowess.
- The Minecraft Mods Route (for an Enhanced Experience): For those seeking a more robust, realistic, or simply less command-intensive tornado experience, community-made mods are an excellent option. There are many fantastic modifications available that introduce advanced weather systems, including highly dynamic and visually stunning tornadoes with realistic physics and devastating power. This path often offers a more "plug-and-play" solution, providing immediate access to pre-built, enhanced weather phenomena.
A Crucial Distinction: This Guide is for Java Edition
Before we delve deeper, it’s vital to clarify that this guide is primarily designed for Minecraft Java Edition. The command structure, syntax, and capabilities in Java Edition are far more extensive and flexible, particularly when it comes to creating complex, chained effects using Command Blocks. While some basic concepts might loosely apply, the intricate command sequences we’ll explore simply aren’t feasible or behave differently in Minecraft Bedrock Edition. So, fire up your Java Edition client and prepare for some serious in-game engineering!
With that understanding firmly in place, let’s dive into the first crucial step: preparing your battlefield with Command Blocks.
While a single, mystical command for a Minecraft tornado remains a myth, the truth is far more exciting: you can build your very own, custom vortex! Now that we’ve cleared the air on the elusive ‘secret’ command, it’s time to roll up our sleeves and dive into the real magic.
The Architect’s Blueprint: Assembling Your Command Block Arsenal
Every epic creation starts with a solid foundation, and your Minecraft tornado is no different. We’re about to lay the groundwork, equipping you with the essential tools and knowledge to kickstart your project. Think of these command blocks as the silent, powerful core that will bring your storm to life.
Tutorial Kick-off: Giving Yourself a Command Block
Before we can build anything, we first need the special blocks themselves! Command blocks aren’t available in the standard Creative inventory, nor can they be crafted in Survival mode. You’ll need to use a specific command to summon them into your possession.
To get your hands on a command block, simply open your chat window (usually by pressing ‘T’ or ‘/’) and type:
/give @p command
_block
/give: This is the command that grants items to a player.@p: This is a target selector that means "the nearest player" – which will be you!command_block: This is the specific item ID for the command block.
Once you hit Enter, a shiny new command block will appear in your inventory. You’ll likely want a few of these, so feel free to run the command multiple times or add a number at the end (e.g., /give @p command
_block 5) to get several at once.
One quick tip before we go further: command blocks can generate a lot of chat messages as they execute. To keep your game chat clean and focused, it’s often a good idea to disable these messages. You can do this with another simple command:
/gamerule commandBlockOutput false
This command won’t affect the command blocks’ functionality, just their chattiness!
Understanding the Command Block Family: Impulse, Chain, and Repeat
Command blocks come in three distinct types, each with its own behavior crucial for different automation tasks. Knowing which to use and when is key to designing complex machines, including our tornado!
- Impulse Command Blocks (Orange): These are the default type. They execute their command once when powered (either by redstone or set to ‘Always Active’). Think of them as a single "push" of a button. We might use one of these to trigger a specific, one-time effect or to initiate a complex sequence.
- Chain Command Blocks (Green): These blocks are designed to work in sequence. A Chain command block will only execute its command if the command block immediately preceding it in the chain successfully executed. They must also be pointed in the correct direction (indicated by an arrow on the block). These are perfect for creating a series of actions that happen one after another.
- Repeat Command Blocks (Blue): These are the powerhouses for continuous effects. A Repeat command block executes its command every single game tick (20 times per second!) as long as it’s powered or set to ‘Always Active’. For our continuous tornado effect, the Repeat command block will be our most important ally.
For our tornado machine, we’ll primarily rely on Repeat command blocks to continuously summon or manipulate the tornado’s elements, and Chain command blocks to link additional effects or manage different aspects of the storm in a coordinated sequence.
Optimal Placement and Orientation: Building Your Command Chain
Command blocks aren’t just placed; they’re arranged. Especially with Chain blocks, their orientation dictates how they connect and execute.
- Start with the Repeat Block: Begin by placing your blue Repeat command block. This will be the heart of your tornado, continuously running the primary command.
- Observe the Arrow: Every command block has a small arrow on one of its sides. This arrow indicates the direction in which subsequent Chain blocks should be placed for them to "link."
- Forming the Chain: To create a command chain, place additional Chain command blocks directly adjacent to the previous block, ensuring their arrows point in the same direction as the block before them. Imagine them as a series of dominoes, each one pushing the next. You can place them in a straight line, turn corners, or even stack them vertically, as long as the arrows maintain the logical flow.
Proper placement ensures that your commands execute in the intended order, building up the complex effects that will form your tornado.
Emphasizing ‘Always Active’ for a Continuous Effect
For your tornado to swirl endlessly without constant redstone input, you’ll need to set your core command blocks to ‘Always Active’. This is a critical setting for any continuous effect.
To do this:
- Right-click on a placed command block to open its interface.
- In the bottom-left corner, you’ll see a button that usually says "Needs Redstone." Click this button.
- It will change to "Always Active."
When a Repeat command block is set to ‘Always Active’, it will execute its command relentlessly, 20 times per second, without needing any external power source. For Chain command blocks, ‘Always Active’ means they’re ready to fire as soon as the previous block in the chain successfully completes its task, still without redstone. This ensures your tornado remains a perpetual force of nature!
Initial Command Block Setup Summary
Here’s a quick reference for the foundational commands you’ll be using:
| Command | Purpose | Notes |
|---|---|---|
/give @p command_block |
Grants you a command block. | Use /give @p command_block <amount> for multiple blocks. |
/gamerule commandBlockOutput false |
Disables command block messages from cluttering your chat. | Run once; can be reversed with true. |
| Placement & Orientation | Place Repeat and Chain blocks, ensuring arrows point in sequence. | Chain blocks must point from the previous block. |
| Set to ‘Always Active’ | Ensure continuous command execution for Repeat and Chain blocks. | Essential for a non-stop tornado; toggle in the block’s GUI. |
| Command Block Types | Understand Impulse (one-time), Repeat (continuous), Chain (sequence). | We’ll primarily use Repeat and Chain for our tornado’s core. |
With your command blocks in hand, properly oriented, and set to ‘Always Active’, you’ve just built the silent, powerful engine block of your very own Minecraft tornado. Now that the foundation is solid, it’s time to infuse these blocks with the actual commands that will conjure the spinning vortex.
With your command blocks meticulously set up and ready for action, it’s time to breathe life into your creation and make something truly spectacular happen. The foundation is laid; now, let’s build the engine!
Spin Cycle: Powering Your Tornado with Command Magic
Every impressive Minecraft contraption needs a driving force, and for our spinning vortex, that force comes from cleverly manipulating entities with a few potent commands. Think of this as the internal motor that gives your tornado its iconic whirlwind motion, making objects not just move, but truly dance in a chaotic circle.
The Invisible Anchor: Your Vortex’s Silent Core
The secret to creating a perfect, controlled spin lies in establishing a central point that acts as the pivot for everything else. We’ll use an armor stand for this, but not just any armor stand – one that’s designed to be the invisible heart of your storm.
Why an armor stand? They are versatile, can be manipulated easily, and crucially, can be made invisible and a "marker," meaning they won’t block blocks or interfere with other entities in unintended ways.
To summon this vital component, open a command block (set to Impulse and Needs Redstone for initial placement, then activate it once) or type directly into chat:
/summon armorstand ~ ~ ~ {Tags:["tornadocore"],Invisible:1b,Marker:1b,NoGravity:1b}
Let’s break down this command:
/summon armor: This simply summons an armor stand at your current location (_stand ~ ~ ~
~ ~ ~).{Tags:["tornado_core"]}: This is crucial! We’re giving our armor stand a uniquetagcalled "tornado_core". This allows us to easily target it with other commands later without accidentally affecting other armor stands.
Invisible:1b: Makes the armor stand completely invisible. Nobody wants to see a floating stand at the center of their tornado!Marker:1b: This property makes the armor stand immune to pushing and pulling by pistons, and prevents it from having a hitbox. It simply acts as a marker or reference point.NoGravity:1b: (Optional but recommended) This prevents the armor stand from falling, ensuring it stays exactly where you summon it.
Once this command is executed, you’ll have an invisible, untargetable entity serving as the perfectly still (for now) eye of your future storm.
Unleashing the Spin: The Command Block’s Dance
Now for the real magic! We’ll use a Repeating Command Block to continuously teleport and rotate our tornado_core. This constant, rapid adjustment creates the illusion of smooth, continuous spinning.
Place a new Repeating Command Block and set it to Always Active. Input the following command:
/execute as @e[tag=tornado
_core] at @s run tp @s ~ ~ ~1 ~20 ~
Let’s dissect this powerhouse command:
/execute as @e[tag=tornado_core]: This tells the game, "For every entity that has the tag ‘tornado_core’…"
at @s: "…execute the following command at the position of that entity." (@srefers back to the entity selected byas, in this case, ourtornado_core).run tp @s ~ ~ ~1 ~20 ~: "…teleport that same entity (@s) relative to its current position."~ ~ ~1: The~1on the Z-axis means it will slightly move forward (relative to its own facing direction) by 1 block each tick. This creates the forward motion that contributes to the "traveling" aspect of a tornado, even if it’s just rotating in place. You can adjust this value for faster/slower forward movement.~20 ~: This is the rotation magic! The first~20rotates the entity by 20 degrees around its vertical axis (yaw) each tick. The second~keeps its pitch (up/down rotation) unchanged. A higher number means faster spinning.
With this command block active, your invisible tornado
_core will now be continuously spinning and inching forward, setting the stage for everything else to follow its lead.
Expanding the Chaos: A Wider Whirlwind
A lone spinning core isn’t much of a vortex. To create a wider, more chaotic effect, we need to add more entities – armor stands, items, even other mobs – and make them spin around our central tornado_core.
First, summon some additional entities that you want to be part of the vortex. For simplicity, let’s use more armor stands, but you can swap these out for any entity of your choice. Make sure to give them a distinct tag, like tornadodebris:
/summon armorstand ~ ~ ~ {Tags:["tornado
_debris"],NoGravity:1b}
You can summon several of these. Now, we’ll use another Repeating Command Block (or chain it to your existing one) to make these "debris" entities orbit the tornado_core.
/execute as @e[tag=tornadocore] at @s run tp @e[tag=tornadodebris,distance=..10] ^ ^1 ^3 ~ ~
Let’s break this down:
/execute as @e[tag=tornado: Just like before, this command starts from the perspective of our spinning core._core] at @s
run tp @e[tag=tornado_debris,distance=..10]: Now, we’re targeting all entities with thetornadodebristag, but only those within 10 blocks (distance=..10) of thetornadocore‘s current position. This ensures only relevant debris spins.^ ^1 ^3 ~ ~: This uses local coordinates relative to thetornado_core‘s facing direction and position.^: This first^refers to the core’s local X-axis (side-to-side). Since it’s^with no number, it means no side-to-side movement.^1: This moves the debris 1 block up relative to the core’s position. Adjust this for height.^3: This moves the debris 3 blocks forward relative to the core’s facing direction. This is what creates the "orbit" effect: as the core spins and moves forward, the debris is constantly being pulled to stay 3 blocks in front of it (relative to its current forward direction), thus creating a circular path.~ ~: Keeps the debris’s own rotation unchanged.
By adjusting the ^3 value, you can control the radius of the spin for your debris. Experiment with ^2, ^5, or even ^10 to see how it affects the vortex’s width. For even more chaos, you can add another ~ to the debris’s teleport command, like ^ ^1 ^3 ~10 ~ to make the individual debris entities also spin on their own axis as they orbit.
With your vortex engine now roaring to life, generating mesmerizing movement, the next step is to give it the dazzling visual appeal it deserves.
Now that you’ve mastered the mechanical core, creating a relentless spinning vortex with armor stands, it’s time to give that raw power a visible, tangible form.
The Invisible Touch: Crafting Your Tornado’s Visual Symphony with Particles
A truly convincing tornado isn’t just about a spinning void; it’s about the chaotic dance of debris, the swirling mist, and the palpable sense of atmospheric upheaval. This is where Minecraft’s particle effects come in, transforming your invisible engine into a breathtaking, terrifying natural phenomenon. Particles are the illusionists’ secret, adding layers of realism and visual fidelity that pull players deeper into the experience. Without them, your spinning core remains just that – a core. With them, it becomes a living, breathing force of nature.
Unleashing the `/particle` Command: Your Artistic Brush
At the heart of bringing your tornado to life is the versatile /particle command. This command allows you to spawn various visual effects at specific locations, with precise control over their appearance and behavior. To attach these dynamic effects to your spinning armor stands, you’ll need to use the execute command, which allows you to run a command at or as an entity.
Here’s the basic structure of how you’ll attach particles to your tornado’s core:
execute at @e[type=armorstand,tag=tornadocore] run particle <particle
_name> ~ ~ ~ <dx> <dy> <dz> <speed> <count> [mode]
Let’s break down the key arguments:
<particle_name>: The type of particle you want to spawn (e.g.,minecraft:cloud).~ ~ ~: These are relative coordinates. Since we’re executing at the armor stand (@e[type=armorstand,tag=tornadocore]),~ ~ ~will spawn particles exactly where the armor stand is located. You can adjust these to~ ~1 ~to spawn them slightly above, or~-0.5 ~ ~0.5for offset positions.<dx> <dy> <dz>: Known as "delta," these values define the spread or random offset for where the particles will appear, relative to the spawn point. Larger values create a wider, more dispersed effect. For a tornado, you’ll want some spread.<speed>: How fast the particles move. Higher values make particles fly away quicker.<count>: The number of particles to spawn with each command execution. For a powerful effect, you’ll want a higher count.[mode]: (Optional) Can beforce(always render, even from far away) ornormal(default, renders based on distance). For a truly impactful tornado,forcecan be beneficial.
Selecting Your Tornado’s Palette: Essential Particle Types
Minecraft offers a wide array of particles, but for a realistic tornado, certain types excel at creating the swirling debris and atmospheric effects.
minecraft:cloud: This is your go-to for the main body of the storm – the swirling mist, the oppressive atmosphere. Use it with a moderate spread and speed to create a dense, opaque core.minecraft:ash: Perfect for adding a layer of fine dust, smoke, or light debris caught in the wind. It gives a grittier, more destructive feel.minecraft:block dirt(orminecraft:fallingdust): To truly sell the effect of a tornado ripping through the landscape, you need swirling ground debris.minecraft:block dirtrequires an additional data tag (dirtitself, orstone,graveletc.) to specify the block type it should emulate. Alternatively,minecraft:fallingdustis a simpler option for general dust/debris.
Let’s look at some examples you could attach to your armor stand, possibly running from a repeating command block:
# Swirling Storm Clouds

execute at @e[type=armorstand,tag=tornadocore] run particle minecraft:cloud ~ ~0.5 ~ 1.5 2 1 100 normal
# Rising Dust and Ash
execute at @e[type=armorstand,tag=tornadocore] run particle minecraft:ash ~ ~0.2 ~ 1 1.5 0.5 0.2 50 normal
# Ground Debris (Dirt)
execute at @e[type=armorstand,tag=tornadocore] run particle minecraft:block minecraft:dirt ~ ~ ~ 1.2 0.5 1.2 0.1 30 normal
Note: For minecraft:block, you specify the block ID directly after the particle name, as shown with minecraft:dirt.
Layering the Illusion: A Command Block Chain Tutorial
The true magic of particle effects lies in layering. A single particle type might look good, but combining several with different properties creates a much richer, more convincing visual. This is where chain command blocks become indispensable.
Step-by-Step Layering:
-
Place the Initial Command Block (Impulse):
- Place a command block on the ground.
- Set its
TypetoImpulse. - Set
ConditiontoUnconditional. - Set
RedstonetoNeeds Redstone. - Enter your first particle command (e.g., for clouds).
- Power this command block with a redstone clock or a repeating command block that powers it. For a continuous effect, a repeating command block is usually placed first, set to
Always Active.- Example (Repeating Command Block first):
# Repeating Command Block (first in chain)

# Command:

execute at @e[type=armorstand,tag=tornadocore] run particle minecraft:cloud ~ ~0.5 ~ 1.5 2 1 100 normal

# Set to: Repeating, Unconditional, Always Active
- Example (Repeating Command Block first):
-
Add the First Chain Command Block:
- Place a second command block directly adjacent to the first, facing the same direction.
- Set its
TypetoChain. - Set
ConditiontoUnconditional. - Set
RedstonetoAlways Active. - Enter your second particle command (e.g., for ash).
- Example:
# Chain Command Block (second in chain)

# Command:

execute at @e[type=armorstand,tag=tornadocore] run particle minecraft:ash ~ ~0.2 ~ 1 1.5 0.5 0.2 50 normal

# Set to: Chain, Unconditional, Always Active
- Example:
-
Continue the Chain:
- Repeat step 2 for every additional particle layer you want to add (e.g.,
block dirt). Ensure eachChaincommand block is placed directly after the previous one, forming a line, and all are set toAlways Active.- Example:
# Chain Command Block (third in chain)

# Command:

execute at @e[type=armorstand,tag=tornadocore] run particle minecraft:block minecraft:dirt ~ ~ ~ 1.2 0.5 1.2 0.1 30 normal

# Set to: Chain, Unconditional, Always Active
- Example:
- Repeat step 2 for every additional particle layer you want to add (e.g.,
This setup ensures that every time the first command block executes, the entire chain follows, creating all your layered particle effects simultaneously and seamlessly. Experiment with different delta (spread), speed, and count values for each layer to find the perfect blend for your ultimate tornado.
Tornado Particle Palette: A Quick Reference
Here’s a comparison of recommended particle commands and their effects to help you craft your tornado’s visual identity:
| Particle Name | Recommended Delta (dx dy dz) | Recommended Speed | Recommended Count | Visual Outcome |
|---|---|---|---|---|
minecraft:cloud |
1.5 2 1.5 |
1 |
100-150 |
Dense, swirling storm mist; core of the vortex. |
minecraft:ash |
1 1.5 1 |
0.2 |
50-80 |
Fine dust, smoke, or light debris; adds grit. |
minecraft:block minecraft:dirt |
1.2 0.5 1.2 |
0.1 |
30-50 |
Swirling ground debris; impact on the environment. |
minecraft:falling_dust |
1 1 1 |
0.15 |
40-70 |
General dust/debris, less specific than block. |
minecraft:flash |
0 0 0 |
0 |
1 |
Brief, bright flash; good for a ‘strike’ effect. |
minecraft:smoke |
1 2 1 |
0.5 |
60-100 |
Darker, thicker smoke; can add an ominous layer. |
With your tornado now a breathtaking visual spectacle, you’re ready to move beyond aesthetics and infuse it with the devastating power it truly deserves.
While visually stunning particle effects set the stage, true immersion comes when your creation impacts the world around it. Your tornado might look menacing, but it becomes truly terrifying when it can tear through structures and toss unfortunate creatures into the sky.
Unleashing Havoc: Giving Your Tornado a Destructive Purpose
Moving beyond mere spectacle, the true power of your Minecraft tornado lies in its ability to interact with and reshape the world around it. In Vanilla Minecraft, this means leveraging the robust command system to simulate genuine destruction and chaos, turning your ethereal vortex into a tangible threat.
Earth-Shattering Commands: Destroying Blocks
To make your tornado a force of nature, you need to grant it the ability to tear through blocks. The /execute command, combined with the /fill command, is your primary tool for this. This powerful duo allows you to target the core of your tornado and then, from that location, fill a specified area with air, effectively making blocks disappear.
The Core Destruction Command
The fundamental command structure involves executing the /fill command at the location of your tornado’s core. Assuming you’ve tagged an entity (like an invisible armor stand) as tornadocore, your command might look something like this:
/execute at @e[tag=tornadocore] run fill ~-3 ~-3 ~-3 ~3 ~3 ~3 air replace
Let’s break this down:
/execute at @e[tag=tornadocore]: This tells the game to run the subsequent command from the exact location of yourtornadocoreentity.run fill ~-3 ~-3 ~-3 ~3 ~3 ~3 air replace: This is the/fillcommand.~-3 ~-3 ~-3 ~3 ~3 ~3: Defines a 7x7x7 cube centered around the tornado core. The~symbol refers to the relative coordinates from theexecutelocation.air: Specifies the block to fill the area with. In this case, it’sair, which destroys existing blocks.replace: This optional keyword ensures that any block within the defined area is replaced byair. You could specifyreplace stoneif you only wanted to destroy stone blocks, for example.
You can run this command repeatedly (e.g., using a repeating command block) to create a continuous path of destruction. Experiment with the size of the destruction cube (~-X ~-Y ~-Z ~X ~Y ~Z) to control the scale of the devastation. Smaller areas might create a more nuanced, swirling destruction, while larger areas will leave a gaping hole.
The Vortex’s Grip: Affecting Mobs and Players
A true tornado doesn’t just destroy scenery; it also interacts violently with anything caught in its path. You can use the /effect give command to inflict damage or manipulate entities, drawing them into your digital maelstrom.
Damage and Levitation Commands
To make your tornado a threat to living beings, target nearby entities with harmful effects:
/execute at @e[tag=tornadocore] run effect give @a[distance=..8] instantdamage 1 0 true

/execute at @e[tag=tornadocore] run effect give @e[type=!player,distance=..8] instantdamage 1 0 true
These commands will:
- Inflict
instantdamageon all players (code>@a</code) or non-player entities (code>@e[type=!player]</code) within 8 blocks of thetornadocore. 1: The duration (for instant effects, this doesn’t matter much, but it’s required).0: The amplifier, meaning basic damage. Increase this for more lethal impacts.true: Hides the particle effect of the damage, making it feel more like environmental harm.
To truly simulate the pull of a vortex, the levitation effect is invaluable:
/execute at @e[tag=tornadocore] run effect give @a[distance=..10] levitation 2 1 true

/execute at @e[tag=tornadocore] run effect give @e[type=!player,distance=..10] levitation 2 1 true
This will:
- Grant
levitationto entities within 10 blocks of the core. 2: A short duration of 2 seconds, ensuring entities are repeatedly pulled up rather than endlessly floating.1: An amplifier of 1, providing a noticeable upward tug. Increase for a stronger pull.true: Hides levitation particles for a cleaner look.
By repeatedly applying levitation, you can create a dynamic effect where mobs and players are constantly lifted and buffeted, making it feel as if they’re being pulled into the tornado’s swirling embrace.
A Word of Caution: Lag and World Damage
While the allure of a truly destructive tornado is strong, it’s crucial to proceed with caution. Commands that continuously modify blocks or affect numerous entities can be incredibly taxing on your game’s performance.
- Test in a Separate World First: Always, always develop and test your destructive commands in a dedicated, expendable world. Do not unleash a block-destroying, entity-tossing command system directly into your main survival world without thorough testing.
- Potential for Lag: Running
/fillcommands frequently, especially over large areas, can cause significant lag, particularly on less powerful systems. Similarly, applying effects to many entities simultaneously can strain performance. - Irreversible World Damage: Once blocks are destroyed by your tornado, they’re gone. There’s no undo button in Vanilla Minecraft. Be mindful of the potential for permanent alteration to your world. Consider limiting the destruction radius or using a less frequent activation for your commands if you want to preserve your world.
Finding the right balance between impressive destruction and smooth gameplay is key. Start small, observe the impact, and gradually scale up your commands until you achieve the desired effect without crashing your game or demolishing cherished builds.
While powerful, these vanilla commands require careful planning and execution. For those seeking even grander, more immediate meteorological mayhem, the world of Minecraft mods offers a simpler, yet equally dramatic path.
If the raw power of command blocks feels like learning a new programming language, fear not, for there’s an "easy button" to summon true meteorological chaos in your Minecraft world.
The Easy Button for Armageddon: Modding Your Way to Monstrous Minecraft Storms
You’ve witnessed the destructive potential of meticulously crafted vanilla setups, but what if you could summon nature’s fury with significantly less effort and even more visual spectacle? Welcome to the thrilling world of Minecraft modding, where unleashing epic weather events is often just a download away, bypassing the intricate dance of command blocks entirely.
Stepping Beyond Vanilla: The World of Modding
Imagine being able to conjure a colossal F5 tornado, complete with swirling debris, realistic sound effects, and tangible destructive power, all without typing a single line of code. That’s the magic of Minecraft mods. These community-created additions fundamentally alter or expand the game’s features, offering powerful alternatives to the vanilla game’s limitations. For those seeking immediate, impactful weather phenomena without the steep learning curve of Redstone and command syntax, mods are a game-changer. They transform the very fabric of your world, turning it into a canvas for dynamic, often terrifying, natural disasters.
Mods vs. Vanilla: Weighing Your Options
Choosing between modded and vanilla Minecraft for your weather-based destruction comes with its own set of advantages and considerations:
-
Ease of Use:
- Mods (Pro): Generally, mods are designed for user-friendliness. Once installed, their features are often accessible via in-game menus, simple commands, or even automatic occurrences, making epic weather far more accessible than complex command block chains. A single download can introduce entire systems.
- Vanilla (Con): Crafting impressive weather effects in vanilla requires deep knowledge of
execute,summon,particle, and other commands, alongside an understanding of Redstone logic and data packs. It’s powerful, but demanding.
-
Game Purity & Stability:
- Mods (Con): Introducing third-party code into your game can sometimes lead to compatibility issues with other mods, occasional bugs, or even game crashes. Finding mods that are regularly updated and stable is crucial.
- Vanilla (Pro): Sticking to vanilla ensures maximum game stability and compatibility with all official updates. You don’t have to worry about broken features after a new Minecraft version drops.
-
Depth & Customization:
- Mods (Pro): Many weather mods offer incredible depth, from realistic storm progression and specific tornado strengths to custom weather effects and unique environmental hazards that vanilla simply cannot replicate.
- Vanilla (Pro/Con): While vanilla offers immense flexibility through command blocks, achieving the visual fidelity and seamless integration of advanced weather systems often seen in mods can be incredibly difficult, if not impossible, without custom textures or resource packs that push the boundaries.
For sheer power, ease of implementation, and breathtaking visual effects, mods often hold the upper hand, especially when it comes to dynamic and destructive weather.
Unleash the Tempest: Spotlight on Weather Mods
Among the vast array of available modifications, specific weather-related mods stand out for their ability to bring true meteorological chaos to your blocky world. One such titan is the Weather, Storms & Tornadoes Mod.
This mod doesn’t just change the sky; it introduces fully dynamic weather cycles, including gentle rains, heavy thunderstorms, and most notably, powerful, destructive tornadoes. With a single mod download and installation, you gain access to:
- Dynamic Tornadoes: These aren’t just visual effects; they actively destroy blocks in their path, suck up entities, and can devastate landscapes, creating an unparalleled sense of danger and awe.
- Varied Storms: Beyond tornadoes, expect blizzards, sandstorms, and more, each with unique environmental impacts and visual flair.
- Realistic Elements: From lightning strikes that ignite fires to the changing wind patterns and cloud formations, the mod aims for an immersive weather experience.
It’s a complete weather overhaul that puts incredible destructive power right at your fingertips, far beyond what simple command blocks can achieve in terms of realism and widespread impact.
Diving Deeper: A Comparison of Top Weather Mods
To help you choose the right tool for your elemental rampage, here’s a comparison of some popular (and representative) weather-related mods for Minecraft Java Edition:
| Mod Name | Key Features | Tornado Strength & Variety | Ease of Installation | Latest Supported MC Version |
|---|---|---|---|---|
| Weather, Storms & Tornadoes Mod | Dynamic weather cycles, blizzards, sandstorms, hail, custom storm types. Real-time destruction. | Highly destructive, visually impactful, multiple F-scale levels, lifts entities and blocks. | Moderate | 1.12.2, 1.16.5, 1.18.2, 1.19.2 |
| Dynamic Weather FX | Realistic rain, fog, snowfall, custom cloud formations, immersive sound effects. Focus on ambiance. | Light; mainly visual funnel clouds, minimal block destruction (configurable). | Easy | 1.19.4, 1.20.1 |
| Realistic Climate Mod | Seasons, temperature simulation, biomes influence weather patterns, prolonged droughts/floods, heatwaves. | None directly; focuses on environmental impact of extended weather events (e.g., erosion). | Moderate | 1.16.5, 1.18.2 |
Note: Supported versions can change frequently with mod updates. Always check the mod’s official page for the most current information.
Getting Started: Your First Steps into Modding
Ready to transform your Minecraft world with these powerful additions? Here’s a quick guide to getting started with modding for Minecraft Java Edition:
- Choose a Mod Loader: The two most popular mod loaders are Forge and Fabric. Most mods are built for one or the other.
- Forge: Older, more established, and supports a vast library of mods.
- Fabric: Newer, lightweight, often preferred for performance-focused mods and faster updates to new Minecraft versions.
- Download the Mod Loader: Visit the official website for Forge (files.minecraftforge.net) or Fabric (fabricmc.net) and download the installer for your desired Minecraft version. Make sure it matches the version of the mod you want to install.
- Run the Installer: Execute the downloaded
.jarfile. It will install the necessary files into your Minecraft launcher. - Download Your Chosen Mod(s): Find your weather mod (e.g., Weather, Storms & Tornadoes Mod) on a reputable site like CurseForge. Ensure the mod version matches your Minecraft version and your chosen mod loader (Forge or Fabric).
- Install the Mod(s): Locate your Minecraft installation folder (
%appdata%\.minecrafton Windows). Inside, you’ll find amodsfolder. Simply drag and drop the downloaded mod.jarfile(s) into thismodsfolder. If the folder doesn’t exist, create it. - Launch Minecraft: Open your Minecraft launcher, select the Forge or Fabric profile you installed, and hit play! Your mods should now be active, ready to bring epic weather to your game.
With just a few simple steps, you can bypass the intricate world of command blocks and dive straight into the heart of meteorological destruction.
Now that you’ve grasped the sheer power and simplicity of modding, it’s time to bring all these secrets together and truly master the art of the Minecraft tornado.
Frequently Asked Questions About Secret Minecraft Tornado Command? Here’s How to Make It Fast
Can you actually make a tornado in Minecraft with a single command?
No, there isn’t a built-in single command to create a tornado in vanilla Minecraft. To truly understand how to mace a tornadoe in mincraft, you’ll need mods or command block setups. These methods allow for the creation of tornado-like effects.
What are the common ways to create a tornado effect in Minecraft?
Mods are the most straightforward way. Several mods add realistic tornadoes to the game. Alternatively, complex command block systems can simulate tornado behavior, though it requires considerable effort to design and implement such a system if you want to know haw to mace a tornadoe in mincraft.
What kind of mods add tornadoes to Minecraft?
Popular mods like "Weather2" (also known as CoroUtil and Weather & Storms) introduce dynamic weather systems, including tornadoes. These mods typically offer configurable tornado behavior and impact. Finding one that allows you to understand haw to mace a tornadoe in mincraft is key.
Are tornado effects made with command blocks realistic?
While command blocks can mimic some tornado-like visual effects and even some functional aspects (like entity displacement), they usually lack the sophisticated AI and physics found in dedicated weather mods. They can give the illusion of how to mace a tornadoe in mincraft.
From a simple myth to a world-shattering reality, you now hold the power of the storm in your hands. You’ve learned how to meticulously build a custom Tornado from the ground up in Vanilla Minecraft, combining invisible armor stands, complex Minecraft Commands, and stunning Particle Effects to create true atmospheric chaos. You also have the key to unlocking instant epic Weather through the incredible world of Minecraft Mods.
Now, the ultimate challenge is yours. Go beyond this Tutorial and experiment! Can you create a fire tornado? A water spout? The commands are your building blocks. We can’t wait to see what you unleash upon your world. Share your most destructive tornado creations and favorite mods in the comments below—let’s see who can build the biggest storm!
