The #1 Secret to DIY Rainbow Roses: A Simple 5-Step Guide
Have you ever marveled at the ethereal beauty of a Rainbow Rose, with its petals painted in a vibrant kaleidoscope of colors, and thought it was pure magic? What if we told you that this seemingly impossible floral masterpiece is not only real but something you can create in your own kitchen? Welcome to the ultimate guide to creating your own stunning DIY Rainbow Roses!
This project is a perfect blend of art and science, and we’re here to demystify the process. The secret lies in a fascinating natural phenomenon called capillary action—the very same way plants drink water. In this simple 5-step guide, we will walk you through everything you need to know to transform ordinary White Roses into breathtaking, multi-colored works of art. Get ready to unlock the magic and impress everyone with your botanical creativity!
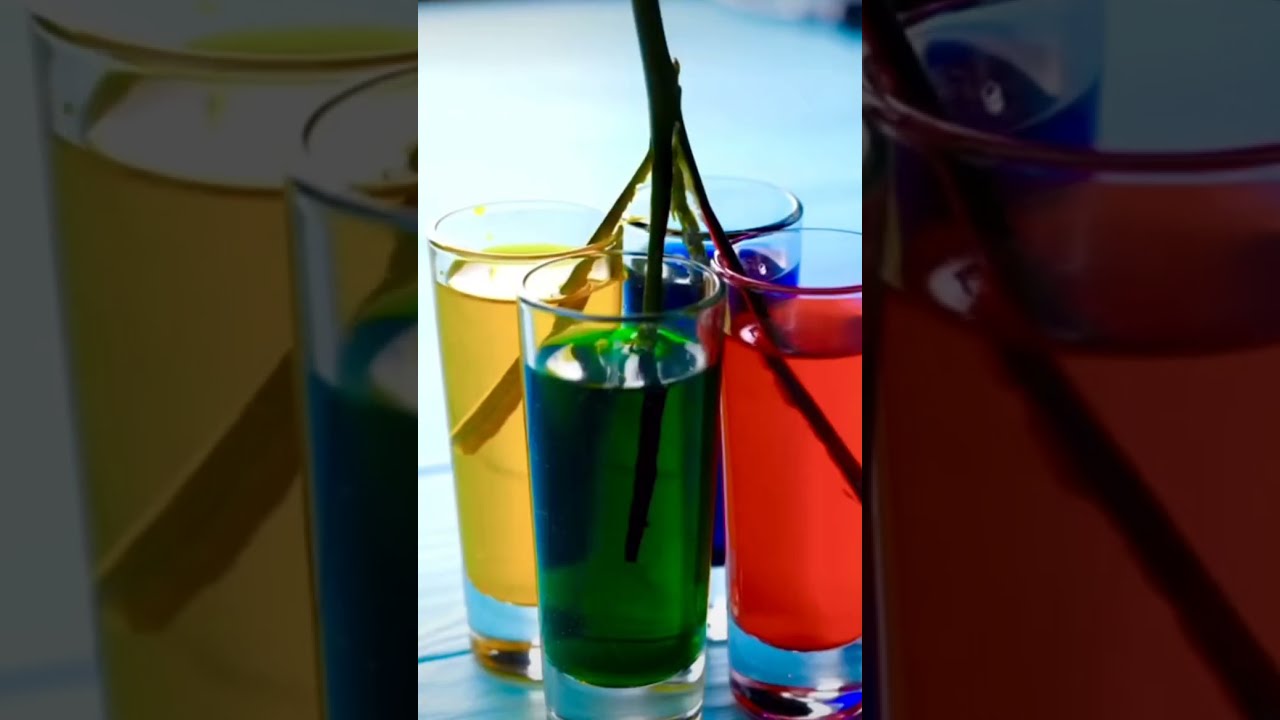
Image taken from the YouTube channel Crafts with Misbah , from the video titled flower color changing experiment | rainbow color rose plant #shorts #craftswithmisbah .
Having explored the sheer delight of bringing beauty into our lives, prepare to step into a realm where the impossible becomes wonderfully tangible.
Unlocking the Rainbow: Your First Steps to DIY Rose Artistry
Imagine a single rose, not just red, pink, or yellow, but a breathtaking cascade of every color of the spectrum, blooming together in harmonious vibrancy. These are Rainbow Roses, a seemingly magical feat of nature and ingenuity that captures the heart and ignites the imagination. For years, these kaleidoscopic beauties have graced high-end florists and dream weddings, appearing almost too perfect, too ethereal to be real. But what if we told you that the secret to creating these stunning botanical masterpieces lies within your reach, right in your own home?
Embrace the Enchantment: Your DIY Journey Begins
This guide isn’t just about crafting a pretty flower; it’s an invitation to embark on an exciting DIY (Do It Yourself) adventure that culminates in truly unique, head-turning floral art. Forget complicated techniques or specialized equipment; our project is designed to be accessible and enjoyable for everyone, regardless of your gardening prowess or artistic background. You’ll be amazed at how easily you can transform ordinary blooms into extraordinary works of living art, adding a splash of personalized magic to your home or creating unforgettable gifts.
The Secret Revealed: Nature’s Own Drinking Straw
The enchantment of a Rainbow Rose isn’t born from artificial dyes sprayed onto petals; it’s a fascinating demonstration of a plant’s natural process. The magic behind these vibrant creations lies in something called capillary action. Think of it like a tiny, intricate drinking straw system within the plant. Just as you sip a drink through a straw, a rose continuously draws water up from its stem through thousands of microscopic tubes, delivering vital hydration to every petal. By strategically introducing different colored water into these tubes, we can guide the rose to absorb and display an entire spectrum of hues within its very structure. It’s science, yes, but it feels like pure alchemy!
Your Roadmap to Radiant Roses: A 5-Step Journey
We’ve distilled this captivating process into a straightforward, easy-to-follow guide, ensuring your success from bud to bloom. Over the next few sections, you will discover exactly how to transform humble White Roses into vibrant works of art, step by simple step:
- Step 1: Gather Your Arsenal – Understanding the essential tools and, most critically, selecting the perfect white roses as your canvas.
- Step 2: Prepare for the Spectrum – Setting up your dyeing stations and preparing your colored water solutions.
- Step 3: The Artistic Cut – Learning the precise technique for splitting the rose stem to allow for multi-color absorption.
- Step 4: The Waiting Game – Placing your roses into the colored solutions and observing the transformation unfold.
- Step 5: Displaying Your Masterpiece – Caring for and showcasing your finished Rainbow Roses to maximize their beauty and longevity.
With this exciting roadmap in hand, your journey into the world of floral alchemy is about to begin. But before you dive headfirst into this vibrant transformation, your first crucial step is to gather the right materials.
Having glimpsed the enchanting possibility of creating your own DIY rainbow roses, your journey begins with preparation, ensuring every detail sets the stage for success.
Why Every Masterpiece Begins with the Right Canvas and Tools
Creating your own dazzling rainbow roses isn’t just about mixing colors; it’s about setting the stage for a truly magical transformation. Before you dive into the vibrant world of dyes, the first, most crucial step is to gather your supplies and select the perfect "canvas" for your floral artistry. This foundational phase ensures your colors pop, your roses thrive, and your project unfolds smoothly.
The Pristine Canvas: Choosing Your White Roses
At the heart of every magnificent rainbow rose lies a pristine white one. These aren’t just any flowers; they are your blank slate, allowing the brilliant hues of food coloring to truly sing. For your colors to burst with vibrancy and clarity, it’s absolutely essential to start with fresh, bright white roses. Any hint of yellowing or dullness will mute your final rainbow effect, so choose your blooms carefully.
Assembling Your Alchemist’s Toolkit
Beyond your beautiful white roses, you’ll need a few common household items that become essential tools in your rose-coloring laboratory. Think of these as your arsenal, each playing a vital role in the upcoming transformation.
To help you keep track, here’s a checklist of everything you’ll need, along with key tips for selecting your roses:
| Essential Materials | Key Selection Tips |
|---|---|
| White Roses | Fresh, bright, unblemished petals; just beginning to open; healthy green leaves |
| Sharp Knife or Shears | Clean, precise cut for stem splitting – a sharp blade prevents crushing and allows for better water absorption |
| Several Tall Glasses or Narrow Vases | One per color you plan to use; tall enough to support roses upright; narrow to minimize the amount of colored water needed |
| Fresh Water | Clean and cool, as it’s the medium through which your roses will absorb their new vibrant colors |
| High-Quality Food Coloring | Liquid concentrated colors are best for vivid results; avoid gel or paste unless specified for dyeing |
Pro-Tips for Rose Selection
While the checklist provides the basics, a true artist knows the nuances. When you’re at the florist or grocery store, don’t just grab the first bunch of white roses you see. Here’s how to pick the best candidates for your rainbow experiment:
- Look for Blooms Just Beginning to Open: Roses that are still somewhat tightly closed but show signs of unfurling their outer petals are ideal. These "buds" will continue to open as they absorb the colored water, giving you a longer-lasting, more dramatic display of color transition. Fully open roses might not absorb as much dye and will fade faster.
- Prioritize a Sturdy Stem: This is perhaps the most critical physical attribute for the success of your rainbow roses. You’ll be performing a precise cut in the next step, known as stem splitting. A firm, thick, and healthy rose stem is paramount. Avoid roses with flimsy, bent, or visibly damaged stems, as they will be difficult to split cleanly and may not absorb color effectively.
- Check for Freshness: Crisp, turgid petals and healthy green leaves indicate a fresh rose, ready to drink up the colored water. Avoid any with wilting leaves, brown edges, or soft petals, as these are signs of an older rose that won’t absorb color well or last long.
Ensuring you have these perfect white roses and all your tools ready is more than just preparation; it’s laying the strong foundation for vibrant success.
With your arsenal gathered and roses perfectly chosen, you’re now poised for the critical next step in this magical transformation.
Now that your perfect white roses and essential tools are gathered and at the ready, it’s time to embark on the most critical, yet delicate, step of our magical transformation.
The Surgical Strike: How a Precise Cut Unleashes Your Rose’s Inner Rainbow
This seemingly simple incision is where the true artistry begins, paving the way for the astonishing multi-hued petals that define a Rainbow Rose. Mastering this technique requires both precision and patience, but the results are undeniably worth the effort.
Prioritizing Your Safety: Handle with Care
Before we delve into the mechanics, a crucial word of caution: this step involves a very sharp knife. The precision required means you’ll be working closely with the blade. Always prioritize your safety and handle the knife with the utmost care and concentration. If you’re unsure or uncomfortable, consider having an experienced adult supervise or assist you.
The Precise Cut: Splitting the Stem
This is where you literally open up your rose to a world of color. The goal is to create multiple pathways for different colored waters to travel up the stem simultaneously.
Here’s how to carefully perform this vital cut:
- Prepare Your Rose: Lay a single white rose on a clean, stable surface. Ensure the stem is free of thorns or leaves where you intend to cut, as these can interfere with the process and your grip.
- Locate the Cutting Point: Focus on the very bottom of the rose stem. You’ll be splitting it upwards by approximately 2 to 3 inches. The exact length isn’t as critical as ensuring the splits are deep enough to create distinct sections for absorption.
- Initiate the Split: With your sharp knife, carefully make a precise, vertical cut directly through the center of the stem’s bottom. Push the knife upwards, steadily splitting the stem into two equal halves for about 2-3 inches. Take your time; a clean, even split is key.
- Further Divisions (Optional but Recommended): If you desire more distinct color segments in your rose (e.g., three or four colors), you can further divide these halves.
- For Three Sections: From the initial central split, carefully create another cut in one of the halves, extending it upwards parallel to the first split, ensuring you aim for three roughly equal sections at the base.
- For Four Sections: After splitting the stem into two halves, repeat the process on each half, splitting them down their centers. This will result in four roughly equal sections at the base of the stem.
- Examine Your Work: Once split, gently fan out the sections of the stem. Each section should be distinct and about 2-3 inches long, allowing it to easily dip into a separate container.
Why This Cut is Absolutely Crucial
You might wonder why such a precise cut is necessary. The ‘why’ behind this step is the very heart of the Rainbow Rose phenomenon:
- Multi-Container Access: By splitting the single rose stem into 2-4 sections, you are creating independent "straws" within the rose. Each of these sections can then be placed into a separate container of colored water.
- Simultaneous Absorption: Instead of absorbing a single color, each split section of the stem can draw up a different color simultaneously. As these individual colored waters travel up through their respective stem sections, they infuse into different segments of the rose’s internal structure.
- The Secret to Multi-Colored Petals: This ingenious technique is the core secret to achieving the mesmerizing multi-colored petals of Rainbow Roses. The split stem allows the distinct dyes to reach different parts of the same petal, resulting in the vibrant, graduated hues that make these roses so unique. Without this precise division, the magic simply wouldn’t happen!
With your roses now perfectly prepared and their internal pathways exposed, you’re ready to move on to the next enchanting phase: infusing them with a spectrum of vibrant colors.
Having precisely cut and prepared your rose stem, it’s now time to embark on the vibrant stage of preparing its magical color journey.
The Alchemist’s Brew: Mixing Your Rose’s Magical Color Potions
This pivotal step is where you transform ordinary water into the vivid elixirs that will infuse your rose with stunning, multi-hued petals. Think of yourself as a potion master, carefully concocting the perfect shades for your floral masterpiece.
Mixing Your Vibrant Elixirs
To begin your color infusion, gather your collection of separate vases or containers – one for each color you plan to use. Precision and generosity are key here:
- Prepare Your Water: Fill each vase with a moderate amount of water. You want enough for your rose stem to be comfortably submerged, but not so much that it’s difficult to handle.
- Add the Magic Drops: Into each vase, dispense a generous amount of food coloring. We’re talking 15-20 drops, or even a bit more, depending on the vibrancy you desire and the concentration of your food coloring. The more concentrated your "potion," the more brilliant the resulting petal hues will be.
- Stir and Observe: Gently stir the water in each vase until the food coloring is completely dissolved and the water is uniformly colored. Admire your concoctions – these are the liquids that will soon paint your rose.
A Spectrum of Possibilities: Choosing Your Hues
While the classic primary colors (Red, Yellow, Blue) offer a fantastic starting point for a rainbow effect, the world of color is your oyster! Don’t be afraid to experiment and create unique combinations.
Here are some ideas to spark your creativity:
| Color Combination Ideas | Expected Petal Results |
|---|---|
| Red + Yellow | Orange and Red Streaks |
| Blue + Red | Purple and Blue Streaks |
| Yellow + Blue | Green and Yellow Streaks |
| Red + Yellow + Blue | Multi-colored streaks (Orange, Green, Purple) |
| Single Color (e.g., Green) | Petals infused with a single, vivid green |
| Primary colors (Red, Yellow, Blue) in separate vases for each split section | Sections of the same rose with distinct Red, Yellow, and Blue petals |
Feel free to mix and match. Perhaps a bold magenta next to a striking cyan, or a subtle pastel palette for a more ethereal look. The possibilities are truly endless!
The Delicate Dance: Placing Your Rose Sections
Now comes the moment of truth, where your perfectly split rose stem meets its colorful destiny. This step requires the utmost care and a steady hand:
- Gentle Does It: Hold your rose by the bloom, ensuring not to touch the delicate split sections of the stem.
- One by One: Carefully lower each individual split section of the rose stem into a different colored vase. For instance, if your stem is split into four sections, you might place one into red water, another into yellow, a third into blue, and the last into green.
- Prevent Snapping: The fresh splits are fragile. Be incredibly gentle to prevent the stem from snapping or further tearing during placement. Take your time, guiding each section carefully into its intended potion. Ensure each split end is fully submerged in its designated colored water.
With your rose stem gracefully settled into its vibrant new home, the stage is set for an incredible natural phenomenon to unfold.
Now that your magical food coloring potions are ready and your roses are basking in their vibrant baths, it’s time to sit back and observe nature’s incredible artwork unfold.
The Invisible Journey: How Your Roses Drink the Rainbow
This next stage might feel like a "waiting game," but beneath the surface, a fascinating scientific process is hard at work, transforming your white roses into stunning rainbow creations. It’s truly a marvel to witness!
The Science Behind the Spectacle
You might wonder how a rose can possibly drink up colored water from a vase. It’s not magic, but a clever trick of nature, powered by a couple of remarkable scientific principles.
Defying Gravity: Capillary Action
Imagine dipping a very thin straw into a glass of water. Have you ever noticed how the water seems to climb a little way up the straw, even before you start sipping? That’s the essence of capillary action! In simple terms, it’s the process where a liquid, like our colored water, actually defies gravity and travels upwards through tiny, narrow tubes. The water molecules are attracted to the material of the tube (and to each other), pulling themselves higher and higher. Your rose, as it turns out, is full of these natural, super-fine straws.
The Plant’s Plumbing: Meet the Xylem
Within the stem of your rose, there’s a special transportation system, just like the plumbing in your house. This system is called the xylem (pronounced ZY-lem). Think of the xylem as the plant’s very own network of microscopic "straws" or pipes. These tiny tubes are perfectly designed to carry water and nutrients from the roots (or, in our case, from your colored potion) all the way up to every part of the plant, including the delicate petals. As capillary action pulls the colored water up, it’s doing so through these amazing xylem channels.
The Thirsty Petals: Understanding Transpiration
But there’s another clever trick involved that helps pull the color even further and faster: transpiration. This is simply the evaporation of water from the tiny pores on the surface of the plant’s leaves and, crucially for our roses, from the petals themselves. As water evaporates from the petals, it creates a gentle "suction" effect, much like when you sip from a straw. This suction pulls more colored water continuously up through the xylem, ensuring a steady flow of vibrant hues to every part of the flower. It’s a continuous, self-driving pump!
The Grand Reveal: A Timeless Transformation
Patience is key during this stage, but you won’t have to wait too long to see the first hints of color. You should start to see color appearing in the edges of the petals and along the veins in just a few hours. For the most dramatic and fully saturated rainbow effects, give your roses about 24 hours. The transformation is truly breathtaking and a wonderful testament to the hidden wonders of the natural world!
Once your roses have fully transformed into vibrant masterpieces, it will be time to learn how to keep them looking their best.
After patiently observing the fascinating science of capillary action and transpiration working its magic, the moment you’ve been eagerly anticipating has finally arrived.
Your Petals, Transformed: Unveiling and Preserving the Life of Your Rainbow Roses
The wait is over, and the payoff is truly spectacular! What began as humble white blooms have undergone a breathtaking metamorphosis, now showcasing a vibrant spectrum of colors that defy imagination.
Witnessing the Grand Reveal
Step back and admire your handiwork. The once-plain white petals have absorbed the colored water, creating a stunning visual tapestry of hues. Each segment of the rose now proudly displays its designated shade, blending harmoniously to form your very own unique Rainbow Roses. It’s a testament to both nature’s processes and your creative vision, transforming a simple flower into a vibrant piece of art. Celebrate this moment of success; you’ve nurtured a beautiful experiment into existence!
Post-Coloring Care for Lasting Beauty
Once your Rainbow Roses have reached their desired vibrancy – a beautiful balance of saturation and color distribution – it’s time to transition them from the coloring solution to a more permanent display. Proper care at this stage is crucial for maintaining their fresh appearance:
- Remove from Coloring: Carefully lift each rose from its individual colored water bottle or container.
- Trim the Stem: Using a clean, sharp knife or floral shears, trim about half an inch to an inch off the bottom of the rose stem. This re-opens the capillaries, allowing for better water absorption in their new vase and removing any split or ragged ends that may have formed.
- Fresh Water Bath: Place each trimmed rose into a single vase filled with fresh, clean water. Avoid overcrowding, as this can lead to faster deterioration.
Tips to Prolong the Life of Your Vibrant Blooms
You’ve put in the effort to create these beauties; now let’s ensure they last as long as possible! With a little ongoing care, your Rainbow Roses can continue to brighten your space for days to come:
- Flower Food is Your Friend: Use a packet of floral food, readily available from florists or garden centers, in your vase water. This provides essential nutrients and helps inhibit the growth of bacteria that can clog the rose stem‘s water uptake system.
- Daily Water Change: Replace the water in your vase daily. Even with flower food, the water can become cloudy and promote bacterial growth, which shortens the life of your flowers. When changing the water, you can also give the rose stem another tiny trim (about a quarter-inch) to ensure optimal water absorption.
- Keep Them Cool: Display your Rainbow Roses in a cool spot, away from direct sunlight, heat sources (like radiators or appliances), and ripening fruit, all of which can accelerate wilting.
Unleash Your Inner Floral Artist: Beyond Roses!
The journey doesn’t have to end with roses! Now that you’ve mastered this fascinating DIY technique, why not experiment further? The principles of capillary action apply to many other white flowers. Carnations, daisies, hydrangeas, and even chrysanthemums can be excellent candidates for this rainbow transformation. Each flower will absorb color differently, offering new opportunities for creative expression. Don’t be afraid to try different color combinations, techniques, and flower types to discover your next vibrant masterpiece!
As you admire your stunning creation and consider future floral adventures, remember that you’ve done more than just color a rose; you’ve unveiled a hidden talent.
Frequently Asked Questions About DIY Rainbow Roses
Can roses naturally grow with rainbow petals?
No, roses do not naturally grow with a rainbow pattern. This striking multi-colored appearance is achieved through a simple, artificial dyeing process that you can easily do at home.
How does this DIY process make a rose change color?
The method relies on the rose’s natural ability to draw water up its stem, a process known as capillary action. By splitting the stem and placing each part in a different food coloring, you can see how do roses change color to rainbow as they absorb the dyes.
How long does it take for the colors to appear?
You can begin to see faint colors on the petals within a few hours. However, for the most vibrant and noticeable rainbow effect, it’s best to allow the rose to absorb the colored water for at least 24 to 48 hours.
What type of rose works best for this project?
White or cream-colored roses, such as the ‘Vendela’ variety, are ideal for this project. Their light-colored petals provide a neutral canvas, which makes the absorbed dyes appear more vivid and true to color.
Congratulations, you are now a DIY Rainbow Rose artisan! You’ve successfully journeyed through the 5 simple steps—from carefully selecting the perfect White Roses and splitting their stems to mixing your colorful potions and witnessing the grand reveal. This project beautifully demonstrates how art and science can intertwine, using vibrant food coloring to visualize the incredible power of a plant’s natural capillary action through its xylem.
You’ve learned that with just a few household items and a little scientific know-how, you can create something truly magical. Don’t keep this beauty to yourself! We would love to see your creations. Share your beautiful Rainbow Roses on social media and tag us! Now go ahead, experiment with new colors and flowers, and continue to find the magic hidden in the everyday world around you.
