EQ Mastery: Vocal Settings You Need to Know!
Achieving professional-sounding vocal tracks requires a solid understanding of equalization (EQ), a critical tool frequently utilized in DAWs such as Pro Tools. The principles taught at institutions like the Audio Engineering Society (AES) emphasizes that applying the best settings for equalizer for best vocals often necessitates a precise approach to frequency manipulation. The frequency spectrum, a fundamental concept in audio engineering, dictates how we perceive different sonic elements, demanding that understanding this element is vital for anyone looking to get the best settings for equalizer for best vocals. It is through the careful application of these principles that producers and engineers can truly master the art of vocal mixing.
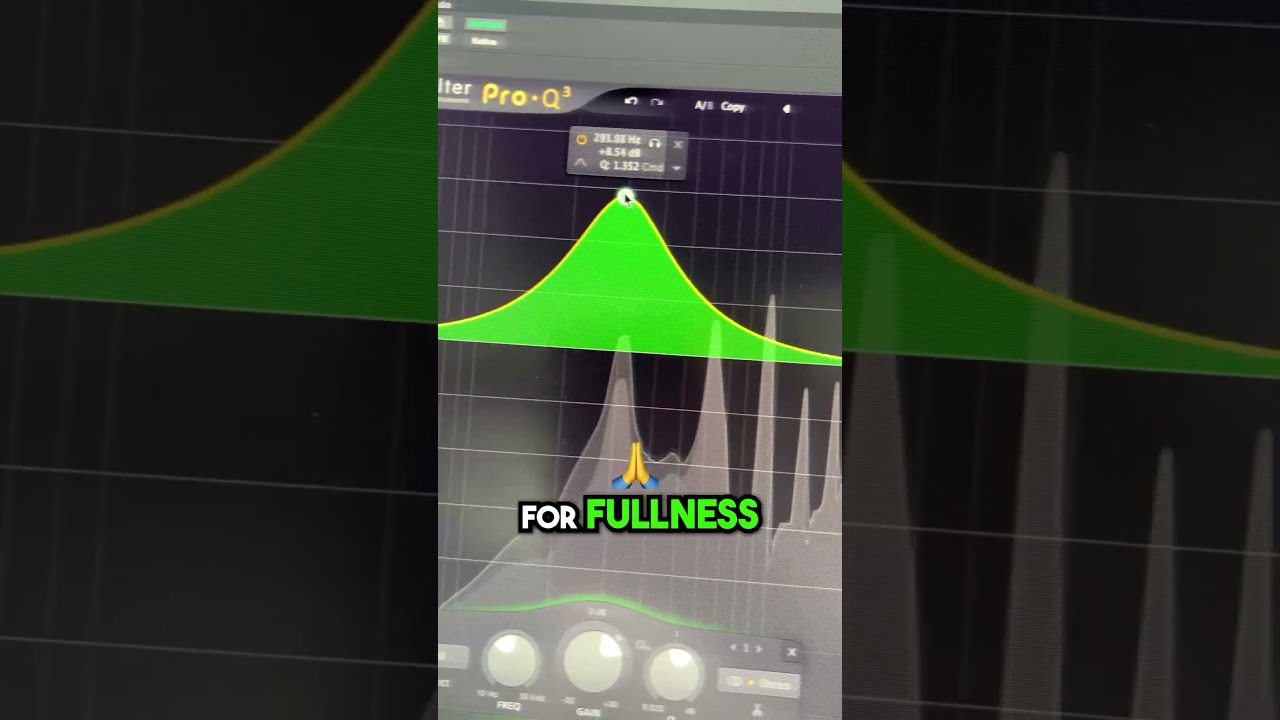
Image taken from the YouTube channel Streaky , from the video titled 🎤 VOCAL EQ SETTINGS ⚙️ .
The human voice, a raw and expressive instrument, forms the emotional core of countless songs. But the journey from a captured vocal performance to a polished, commercially viable recording requires finesse and a keen understanding of audio manipulation. At the heart of this transformation lies equalization, or EQ.
EQ is far more than a simple tone control; it’s a surgical tool, capable of sculpting and refining vocal tracks with breathtaking precision. Its mastery is indispensable for producers, engineers, and even vocalists themselves aiming for professional-grade results.
The Fundamental Role of EQ in Shaping Vocal Tracks
Equalizers allow us to selectively boost or attenuate specific frequency ranges within an audio signal. Think of it as a sonic sculptor, chiseling away imperfections and highlighting desirable characteristics.
In the context of vocals, EQ allows us to tackle a myriad of issues, from taming harsh sibilance to adding warmth and presence. Without EQ, a vocal track might sound muffled, thin, or simply lack the necessary "glue" to sit properly within a mix.
The Transformative Impact of Effective EQ on Vocal Quality
The impact of well-executed EQ on vocal quality is nothing short of transformative. By carefully manipulating the frequency spectrum, we can achieve several key objectives:
- Clarity: Removing muddiness and enhancing intelligibility, ensuring every word is crisp and clear.
- Presence: Bringing the vocal forward in the mix, commanding attention and captivating the listener.
- Warmth: Adding a pleasing roundness and richness to the lower frequencies, providing a sense of intimacy.
- Control: Taming harsh frequencies and resonances, resulting in a smooth and polished sound.
These improvements combine to create a vocal performance that not only sounds technically superior but also resonates more powerfully with the listener, amplifying the emotional impact of the song.
Actionable Insights: Optimizing Your Vocal EQ Settings
Throughout this guide, we will explore a range of practical techniques for optimizing vocal EQ settings. These include:
- Identifying and addressing common vocal issues like proximity effect and sibilance.
- Understanding the nuances of different EQ types and plugins.
- Developing a strategic approach to EQ based on genre and vocal style.
- Learning to make subtle, yet impactful adjustments that preserve the integrity of the original performance.
By following these actionable insights, you’ll be well-equipped to elevate your vocal productions to new heights.
The Significance of Understanding the Frequency Spectrum in Vocal EQ
A deep understanding of the frequency spectrum is paramount to effective vocal EQ. Vocals occupy a wide range of frequencies, each contributing to the overall sound and character. Knowing where key vocal elements reside – the warmth in the lower mids, the clarity in the upper mids, the sibilance in the high frequencies – allows you to make targeted adjustments with confidence.
Without this foundational knowledge, EQ adjustments become a matter of guesswork, often leading to undesirable results. By mastering the vocal frequency spectrum, you gain the ability to diagnose problems quickly and apply precise solutions, ensuring your vocals sound their absolute best.
The transformative impact of well-executed EQ on vocals is undeniable. But to wield this power effectively, we must first understand the sonic landscape in which we operate. That landscape is the frequency spectrum, and mastering its intricacies is paramount to achieving vocal excellence.
Deciphering the Vocal Frequency Spectrum: A Comprehensive Guide
Understanding the frequency spectrum is akin to a painter understanding their color palette. It provides the essential framework for making informed decisions about EQ adjustments. The frequency spectrum represents the range of audible frequencies, typically from 20 Hz to 20 kHz, and each section plays a unique role in shaping the character of a vocal performance.
The Vocal Frequency Spectrum: A Detailed Breakdown
The human voice is a complex instrument, producing a rich tapestry of frequencies. These frequencies can be broadly categorized into several key regions:
-
Low Frequencies (20 Hz – 250 Hz): This range contributes to the warmth, body, and fullness of the vocal. Too much energy here can result in muddiness, while too little can sound thin and weak.
-
Low-Mid Frequencies (250 Hz – 500 Hz): This region provides the core of the vocal tone. It dictates the weight and substance of the voice. Over-emphasis can lead to a boxy or muffled sound.
-
Mid Frequencies (500 Hz – 2 kHz): The mid frequencies are critical for clarity and definition. They contain the essential information that allows us to distinguish individual vocal timbres. Cuts or boosts in this range can dramatically alter the overall sound.
-
High-Mid Frequencies (2 kHz – 4 kHz): This region influences the presence and intelligibility of the vocal. It’s where the ear is most sensitive, and adjustments here can make a vocal cut through a mix.
-
High Frequencies (4 kHz – 20 kHz): The high frequencies are responsible for air, sparkle, and sibilance. Too much energy in this region can cause harshness, while too little can sound dull and lifeless.
Key Frequencies and Vocal Qualities
Different vocal qualities are predominantly shaped by specific frequency ranges. Identifying these ranges allows for targeted EQ adjustments to enhance desirable characteristics and mitigate unwanted ones.
-
Warmth (120 Hz – 250 Hz): The foundation of vocal warmth resides in this lower frequency range. Boosting this area can add a pleasing roundness and intimacy to the vocal. Be cautious of over-boosting, which can create muddiness.
-
Clarity (1 kHz – 4 kHz): Vocal clarity hinges on the definition and intelligibility in the mid and high-mid frequencies. Carefully boosting around 2 kHz – 3 kHz can significantly improve the articulation of consonants and the overall clarity of the vocal.
-
Sibilance (5 kHz – 8 kHz): Harsh "s" and "t" sounds, known as sibilance, typically reside in this upper frequency range. De-essers and precise EQ cuts can tame excessive sibilance, preventing listener fatigue.
Impact of Each EQ Band on Vocal Characteristics
Understanding how each EQ band affects vocal characteristics allows us to make precise and effective adjustments.
-
Low Shelf: Boosting the low frequencies with a low shelf filter can add warmth and fullness. Cutting the lows can clean up muddiness.
-
Low-Mid Cut: A gentle cut in the low-mids can remove boxiness and improve clarity, particularly for vocals with a naturally thick tone.
-
Mid Boost: A subtle boost in the mids can enhance presence and definition, helping the vocal cut through a dense mix.
-
High-Mid Boost: Boosting the high-mids can increase intelligibility and add excitement. Be mindful of potential harshness.
-
High Shelf: A high shelf filter can add air and sparkle, but excessive boosting can introduce unwanted sibilance.
By mastering the relationship between frequency ranges and vocal qualities, you can unlock the full potential of EQ and sculpt vocal tracks that captivate and resonate with listeners. Understanding these ranges and their effects provides a solid foundation for making informed EQ decisions.
The tapestry of the vocal frequency spectrum now understood, the next step involves mastering the tools and techniques that allow us to sculpt and refine our vocal performances. These tools, when wielded with precision and understanding, become extensions of our artistic intent, enabling us to unlock the full potential of every vocal track.
Essential EQ Tools and Techniques for Vocal Mastery
The journey to vocal excellence through EQ demands a deep understanding of the tools at our disposal. From the versatile parametric EQ to specialized processors like de-essers, each tool serves a unique purpose in shaping the sonic character of a vocal. This section will delve into these essential tools and techniques, offering practical insights into their effective application.
Parametric EQ: The Sculptor’s Chisel
The Parametric EQ stands as the cornerstone of vocal shaping. Its power lies in its flexibility and precision, granting users granular control over the frequency spectrum. Unlike simpler EQ types, the Parametric EQ allows you to precisely define which frequencies to adjust, how much to adjust them, and how wide the affected frequency range should be.
This level of control is achieved through three primary parameters: frequency, gain, and Q-factor.
Frequency, Gain, and Q-Factor: The Three Pillars of Control
-
Frequency: This parameter determines the center frequency of the EQ band. It specifies the exact point in the frequency spectrum that will be affected by the adjustment.
-
Gain: Gain controls the amount of boost or cut applied to the selected frequency. Positive values boost the signal, increasing the volume of that frequency range. Negative values cut the signal, reducing its volume.
-
Q-Factor: Also known as bandwidth or resonance, the Q-factor defines the width of the frequency band affected by the EQ. A high Q-factor results in a narrow, precise adjustment, targeting a specific frequency range. A low Q-factor creates a wider, more gradual adjustment, affecting a broader range of frequencies.
Mastering these three parameters is crucial for making subtle yet impactful changes to the vocal tone. Experimentation and careful listening are key to developing an intuitive understanding of how each parameter affects the overall sound.
High-Pass Filters (HPF) / Low-Cut Filters: Clearing the Mud
The High-Pass Filter (HPF), also known as a Low-Cut Filter, is an indispensable tool for cleaning up low-frequency clutter in vocal recordings. Vocals, by nature, don’t contain much useful information in the very low frequencies. These frequencies are instead often occupied by unwanted rumble, microphone handling noise, or proximity effect build-up.
An HPF attenuates frequencies below a specified cutoff point, allowing higher frequencies to pass through unaffected. This effectively removes the muddy, undefined low-end that can cloud a vocal track and detract from its clarity.
Selecting the Optimal Cutoff Frequency
Choosing the right cutoff frequency for an HPF is crucial. Setting it too low will fail to remove the unwanted rumble, while setting it too high can thin out the vocal and rob it of its warmth.
The ideal cutoff frequency depends on several factors, including:
- The singer’s vocal range: Lower voices can often tolerate a slightly lower cutoff frequency.
- The microphone used: Some microphones are more prone to picking up low-frequency rumble.
- The recording environment: Noisy environments may require a higher cutoff frequency.
As a general starting point, try a cutoff frequency between 80 Hz and 120 Hz and adjust it based on the specific characteristics of the vocal recording.
Mastering the De-esser: Taming Sibilance
Sibilance, the harsh "s" and "t" sounds that can plague vocal recordings, is a common challenge in vocal production. A De-esser is a specialized tool designed to identify and reduce these excessive high-frequency sounds.
De-essers work by detecting the characteristic frequencies of sibilance and then applying gain reduction to those frequencies. This process effectively tames the harshness without dulling the overall vocal tone.
Identifying and Reducing Excessive "S" and "T" Sounds
The key to effective de-essing lies in precise identification of the sibilant frequencies. This typically involves listening closely to the vocal track and pinpointing the frequencies where the harshness is most pronounced.
Most de-essers offer adjustable parameters, such as:
- Frequency: Specifies the center frequency where the de-essing will occur.
- Threshold: Determines the level at which the de-esser will begin to apply gain reduction.
- Amount: Controls the amount of gain reduction applied to the sibilant frequencies.
Subtlety is key when using a de-esser. Over-de-essing can result in a lisping or muffled sound. Start with gentle settings and gradually increase the amount of de-essing until the sibilance is tamed without compromising the natural quality of the vocal.
Practical Use of EQ Plugins
The digital audio workstation (DAW) market is flooded with diverse EQ plugins, each boasting unique features and sonic characteristics. While personal preference often dictates choice, some plugins have risen to prominence for their versatility and effectiveness.
Here are a few popular examples:
-
FabFilter Pro-Q 3: Renowned for its surgical precision, intuitive interface, and dynamic EQ capabilities. Its spectrum analyzer is a visual asset for identifying problematic frequencies.
-
Waves Renaissance EQ: A classic, warm-sounding EQ known for its musicality and ease of use. It’s a versatile workhorse suitable for a wide range of vocal styles.
-
iZotope Ozone: A comprehensive mastering suite that includes a powerful EQ module. Ozone’s EQ is particularly useful for making subtle, broad-stroke adjustments to the overall vocal tone in the context of a full mix.
When choosing an EQ plugin, consider its features, sonic character, and ease of use. Experiment with different plugins to find the ones that best suit your workflow and artistic vision.
The ability to surgically manipulate frequencies is only half the battle. Truly mastering vocal EQ lies in understanding when and how to apply these tools to achieve specific sonic goals. We now turn our attention to practical EQ settings, strategies designed to tackle common vocal challenges and elevate your mixes to a professional standard.
Vocal EQ Settings: Strategies for Clarity, Presence, and Control
The art of vocal EQ involves more than just sweeping through frequencies until something "sounds good." It demands a strategic approach, tailoring settings to address specific issues and enhance the desired characteristics of the vocal performance. This section provides actionable strategies for enhancing clarity, controlling the proximity effect, managing sibilance, and boosting vocal presence – all essential elements of a polished vocal track.
Enhancing Clarity: Unveiling Vocal Intelligibility
Vocal clarity is paramount. It’s the difference between a muddy, unintelligible vocal and one that commands attention and conveys emotion with pristine articulation. Achieving clarity often involves carefully boosting specific high-mid frequencies to accentuate the nuances of the vocal performance.
Strategies for boosting high-mid frequencies to improve vocal intelligibility include:
-
Targeting the 2kHz – 5kHz range: This is where many consonants and articulation details reside. A gentle boost in this area can significantly improve vocal intelligibility.
-
Using a wide Q-factor: Employing a wider Q-factor ensures a broader, more natural-sounding enhancement, avoiding harsh or nasal tones.
-
Subtlety is key: Over-boosting can lead to a brittle, fatiguing sound. Start with small increments and listen critically in the context of the full mix. Remember that less is often more.
Controlling Proximity Effect and Low-End Mud
The proximity effect, a low-frequency boost that occurs when a vocalist sings too close to the microphone, can introduce unwanted muddiness and rumble. This is a common issue, particularly in untreated recording environments. Fortunately, the solution is relatively straightforward.
Utilizing High-Pass Filters to eliminate unwanted low-frequency build-up:
-
Implement a High-Pass Filter (HPF): This effectively removes frequencies below a certain cutoff point, cleaning up the low end and improving overall clarity.
-
Start around 80Hz-120Hz: This range is a good starting point for most vocals, but the optimal setting will vary depending on the vocal’s characteristics and the mix’s overall frequency balance.
-
Listen carefully and adjust: Sweep the cutoff frequency until you hear the mud disappear without thinning out the vocal too much. It’s a delicate balance.
Dealing with Sibilance: Taming Harsh "S" Sounds
Sibilance, the harshness and emphasis on "s" and "t" sounds, can be a distracting issue in vocal recordings. A de-esser is the tool of choice for managing sibilance without compromising the overall vocal tone.
Precise use of De-essers to reduce harshness without dulling the overall vocal tone:
-
Frequency Selection: The de-esser must be tuned to the specific frequency range where the sibilance is most prominent, usually between 5kHz and 8kHz.
-
Threshold Control: Adjusting the threshold determines the level at which the de-esser begins to attenuate the sibilant frequencies.
-
Ratio Adjustment: The ratio dictates the amount of gain reduction applied to the sibilant frequencies once the threshold is exceeded.
-
Careful Monitoring: Over-processing with a de-esser can lead to a lisping or muffled sound. Use with caution and listen attentively to the overall vocal texture.
Managing Vocal Presence: Projecting in the Mix
Vocal presence refers to the vocal’s ability to stand out in the mix without sounding harsh or overbearing. Achieving presence often involves carefully sculpting the upper-midrange frequencies to bring the vocal forward and command attention.
Adjusting upper-midrange frequencies to make the vocal stand out in the mix:
-
Identify the vocal’s sweet spot: Sweep through the 1kHz – 4kHz range to find the frequencies that give the vocal its unique character and presence.
-
Gentle boosts: Apply subtle boosts (1-3 dB) in these areas to enhance the vocal’s prominence.
-
Consider the overall mix: Be mindful of other instruments in the mix that occupy similar frequency ranges. EQ decisions should always be made in the context of the entire arrangement. Adjust the EQ of other tracks if necessary to make room for the vocal.
Advanced EQ Techniques: Surgical Precision and Dynamic Control
Having a solid foundation in basic vocal EQ strategies is essential, but sometimes, more nuanced approaches are required.
These advanced techniques, including surgical EQ and dynamic EQ, allow for greater precision and responsiveness, enabling you to tackle complex vocal challenges with finesse.
They also require a heightened awareness of the potential for over-processing, emphasizing the importance of subtle, informed adjustments.
Surgical EQ: Precision Frequency Removal
Surgical EQ involves precisely identifying and attenuating narrow bands of frequencies that are causing unwanted resonances, harshness, or muddiness in the vocal track.
This technique is akin to a surgeon using a scalpel, targeting specific problem areas without affecting the overall health of the surrounding tissue.
Unlike broad EQ strokes, surgical EQ focuses on narrow, precise cuts, often with a high Q-factor (bandwidth).
Identifying Problematic Frequencies
The key to successful surgical EQ lies in accurately identifying the offending frequencies.
This often requires careful listening with headphones or studio monitors, and potentially using a spectrum analyzer to visually pinpoint peaks and resonances.
Sweeping a narrow band boost across the frequency spectrum can help isolate the troublesome areas; when the boosted frequency amplifies the unwanted sound, you’ve found your target.
Applying Surgical Cuts
Once identified, use a narrow band cut (notch filter) to reduce the gain of the problematic frequency.
Start with subtle cuts (e.g., -1dB to -3dB) and gradually increase the attenuation until the issue is resolved, without audibly degrading the overall vocal tone.
It is crucial to A/B the processed and unprocessed audio frequently to ensure you aren’t overdoing it.
Surgical EQ isn’t about dramatically altering the sound, but rather about removing distracting elements that prevent the vocal from shining.
Dynamic EQ: Real-Time Responsive Control
Dynamic EQ combines the precision of parametric EQ with the responsiveness of compression.
It allows you to EQ specific frequencies only when they exceed a certain threshold, providing a more natural and adaptive form of control.
Instead of applying static EQ adjustments, dynamic EQ reacts to the changing dynamics of the vocal performance.
How Dynamic EQ Works
Dynamic EQs essentially function as frequency-selective compressors or expanders.
You set a threshold for a specific frequency band, and when the signal in that band exceeds the threshold, the EQ either cuts (attenuates) or boosts the gain of that frequency.
This is particularly useful for addressing issues that are only present at certain points in the vocal performance, such as sibilance that only occurs during loud passages, or boominess that emerges during low notes.
Applications of Dynamic EQ
Dynamic EQ excels in situations where static EQ adjustments would be too heavy-handed.
For example, it can be used to tame excessive sibilance only when it becomes prominent, or to reduce low-end rumble only when the vocalist gets very close to the microphone.
It’s also useful for de-essing more naturally compared to traditional de-essers, because you can target a wider frequency range.
Dynamic EQ can also subtly add "air" to a vocal only during quieter, breathier passages without making louder parts harsh.
The Importance of Subtle Adjustments: Avoiding Over-Processing
Both surgical EQ and dynamic EQ, while powerful tools, can easily lead to over-processing if not used judiciously.
The goal is to enhance the vocal subtly, not to drastically reshape it.
Aggressive EQ moves can introduce unwanted artifacts, such as phasing issues, harshness, or a "processed" sound that detracts from the naturalness of the performance.
Listen in Context
Always make EQ decisions in the context of the entire mix, not in isolation.
What sounds good on its own may not necessarily work well within the arrangement.
Ensure that your EQ moves complement the other instruments and contribute to the overall sonic balance.
A/B Testing and Reference Tracks
Regularly compare the processed vocal to the original, unprocessed version to ensure that your EQ moves are genuinely improving the sound.
Using reference tracks—professionally mixed songs with similar vocal styles—can also provide a helpful benchmark for your EQ decisions.
The key is to strive for transparency, where the EQ adjustments are imperceptible on their own, but contribute to a more polished and compelling vocal performance.
Genre-Specific Vocal EQ
The ideal EQ settings for vocals often depend on the genre of music.
A pop vocal, for instance, might benefit from a brighter, more present sound, while a rock vocal might require more emphasis on power and aggression.
Understanding these genre conventions can help guide your EQ choices and ensure that the vocal sits appropriately within the overall mix.
Pop Vocals
Pop vocals often benefit from a bright and airy quality.
Consider gentle boosts in the high-mid frequencies (around 3kHz-5kHz) to enhance clarity and presence.
Be mindful of sibilance, and use a de-esser or dynamic EQ to control any harshness.
Rock Vocals
Rock vocals often need to cut through a dense mix.
A slight boost in the upper-mids (around 1kHz-3kHz) can help the vocal stand out.
Also, consider attenuating some of the low-mid frequencies to reduce muddiness and create space for the guitars and bass.
Hip-Hop Vocals
Hip-hop vocals often prioritize clarity and intelligibility.
Pay close attention to the low-end, using a high-pass filter to remove any unnecessary rumble or mud.
A gentle boost in the high-mids can help the vocal cut through the beat, while a de-esser can tame any harsh sibilance.
Country Vocals
Country vocals often have a warm and natural tone.
Avoid excessive high-frequency boosts that can sound harsh or artificial.
Focus on the mid-range, using subtle EQ adjustments to enhance the vocal’s presence and emotion.
By considering the specific genre and the desired sonic characteristics, you can tailor your EQ settings to create a vocal sound that perfectly complements the music.
Common EQ Mistakes to Avoid: Preserving Vocal Integrity
Effective vocal EQ is a crucial skill, but it’s easy to fall into traps that can damage your vocal tracks, rather than enhance them. Understanding common EQ mistakes is essential for preserving the integrity and natural character of your vocals, ultimately leading to a more polished and professional sound.
The Pitfalls of Over-Boosting
One of the most frequent errors is excessive boosting of frequencies. While it’s tempting to crank up certain bands to achieve a desired effect, over-boosting can introduce unwanted artifacts, harshness, and an unnatural tonal balance.
It can also eat up headroom, leading to a less dynamic and punchy final product.
The Accumulative Effect
Even seemingly small boosts, when applied across multiple frequencies, can accumulate and create a muddy or artificial sound. This is particularly true in the low-mid frequencies, where excessive boosting can quickly lead to a boomy, undefined vocal.
Instead of reaching for large boosts, focus on making subtle, targeted adjustments. Often, a small cut in a competing frequency range can achieve the desired effect without compromising the overall vocal quality.
Losing Sight of the Mix Context
Another critical mistake is neglecting the context of the entire mix when EQ’ing vocals. Vocals don’t exist in isolation; they interact with all the other instruments and elements in your song.
EQ decisions made without considering these interactions can lead to a vocal that sounds great on its own but clashes with the rest of the track.
The Importance of Balance
A vocal that is too bright, too bassy, or too scooped may not sit well within the overall sonic landscape. For example, a heavily boosted high-end might sound appealing in solo, but it could exacerbate sibilance issues when combined with other bright instruments like cymbals or guitars.
Always EQ your vocals within the context of the full mix, paying close attention to how they interact with other instruments, and adjust your settings accordingly. This often involves making subtractive EQ decisions to carve out space for the vocal, allowing it to breathe and cut through without overpowering other elements.
The Danger of Preset Dependence
While EQ presets can be a useful starting point, relying solely on them is a surefire way to create generic and uninspired vocal tracks. Presets are designed for specific vocal types and recording conditions, and they rarely translate perfectly to every situation.
Blindly applying a preset without understanding its underlying parameters or tailoring it to your specific vocal track can result in an unnatural and processed sound.
Understanding the "Why" Behind the "What"
Instead of simply loading a preset and moving on, take the time to analyze its settings and understand why each adjustment was made. Experiment with tweaking the parameters to suit your vocal track and the context of your mix.
Ultimately, the goal is to develop your own EQ skills and intuition, so you can make informed decisions based on what you hear, rather than blindly following a preset recipe.
EQ Mastery: Vocal Settings FAQs
Here are some common questions about EQing vocals, helping you achieve a professional sound in your mixes.
What’s the most crucial frequency range to focus on when EQing vocals?
The 2kHz to 5kHz range, often called the "presence" range, is vital. Adjusting here can bring vocals forward in the mix and improve clarity. However, too much can cause harshness, so use a light touch when using equalizer for best vocals.
How can I remove muddiness from my vocal recordings?
Reducing frequencies in the low-mid range, typically between 200Hz and 500Hz, can help. This area often contributes to a muddy or boxy sound. Experiment with gentle cuts to clean up the low end of your vocals using equalizer for best vocals.
What’s the best way to deal with sibilance ("s" sounds) in a vocal track?
Use a de-esser, which is a specialized compressor that targets sibilant frequencies, usually in the 5kHz to 8kHz range. Alternatively, you can use a narrow EQ cut in that area, but be careful not to make the vocal sound lispy.
Are there any "best settings" for equalizer for best vocals that work every time?
Unfortunately, no. Every vocal and recording environment is different. What works for one vocalist might not work for another. The key is to listen critically and make adjustments based on what you hear. Start with subtle changes and gradually increase the adjustments until you achieve the desired result.
So, experiment with these tips, trust your ears, and find what works best for *your* vocals. Getting the best settings for equalizer for best vocals can seem tricky at first, but with a little practice, you’ll be crafting killer vocal tracks in no time. Happy mixing!
