Can’t Find Furigana on Word? Here’s the Secret to Fix It
Have you ever found yourself staring at a dense block of Kanji in a Microsoft Word document, desperately wishing for a simple way to see the pronunciation? For any Japanese language student or professional, this frustration is all too common. Furigana, the essential phonetic guide that hovers above characters, is a lifesaver for deciphering complex text, but finding and enabling it in Word can feel like searching for a hidden treasure.
You’re not alone in this struggle. Many users believe the feature is missing or buried deep within confusing menus. But what if we told you that the key to unlocking this powerful tool is right at your fingertips? This guide is here to reveal the ‘secrets’ to effortlessly activating and customizing Furigana using Word’s built-in Phonetic Guide.
Get ready to transform your workflow! We will walk you through 5 crucial steps, from setting up the initial language support to mastering advanced customization, turning your frustrating search into a moment of triumph.
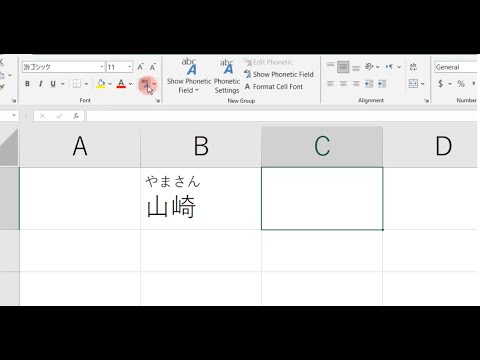
Image taken from the YouTube channel Rukiichi , from the video titled How to add furigana to kanji words in Microsoft Excel / Word .
For anyone navigating the intricacies of the Japanese language, a specific tool often stands between fluency and frustration: Furigana.
From Frustration to Fluency: Unveiling Furigana’s Power in Microsoft Word
What is Furigana and Why Does it Matter?
At its core, Furigana serves as an indispensable phonetic guide in the Japanese writing system. These are the small kana characters (hiragana or katakana) placed above or beside more complex kanji characters to indicate their pronunciation. For Japanese language students, Furigana is an essential learning aid, bridging the gap between unfamiliar kanji and their spoken forms. It helps in deciphering meaning, practicing pronunciation, and solidifying vocabulary.
Beyond students, professionals working with Japanese documents—from transcribers and translators to business communicators—rely on Furigana for precision and clarity. It ensures correct readings of names, places, and specialized terminology, especially when a kanji can have multiple readings depending on context. Without it, even native speakers can sometimes struggle with less common or nuanced kanji combinations.
The Elusive Phonetic Guide: A Common Microsoft Word Conundrum
If you’ve ever found yourself staring at a Japanese document in Microsoft Word, wondering where the helpful Furigana is, you’re certainly not alone. Many users, from beginners to seasoned linguists, encounter a common roadblock: the apparent absence or inaccessibility of Furigana functionality. The frustration often stems from searching for a direct "Furigana" button or option and coming up empty-handed. It can feel like a hidden feature, crucial yet inexplicably hard to find, leading to countless hours spent manually adding readings or resorting to external tools. This common hurdle, however, is easily overcome once you know where to look.
Your Map to Clarity: What This Guide Will Uncover
This isn’t just a troubleshooting guide; it’s a deep dive into the ‘secrets’ of Microsoft Word’s phonetic guide. Our purpose is to transform that common frustration into confident mastery, showing you how to effortlessly activate Furigana and customize Furigana settings directly within Word. We’ll demystify the process, revealing the precise steps to not only enable this powerful feature but also tailor it to your specific needs, ensuring your Japanese documents are always clear and accurate.
Your Journey Ahead: The Five Key Steps to Furigana Mastery
To fully unlock the potential of Furigana in Microsoft Word, we’ll guide you through five crucial steps, each building upon the last to ensure a comprehensive understanding:
- Setting the Stage: Enabling Japanese Language Support
- Pinpointing the Feature: Locating the Phonetic Guide
- Applying the Guide: Adding Furigana to Your Text
- Refining the Look: Customizing Furigana Display
- Beyond the Basics: Advanced Tips and Troubleshooting
Our quest for clarity begins not within the specific tools of Word, but with a foundational setting often overlooked, yet absolutely critical for Japanese language functionality.
Before you can unlock the convenience of Furigana and the Phonetic Guide in Microsoft Word, it’s essential to understand that this powerful feature relies on your Office applications being configured to properly handle Japanese text.
The Cornerstone: Why Your Office Needs to Speak Japanese First
Many users find themselves searching for the Phonetic Guide feature without realizing that its visibility and functionality are directly tied to the language settings of their Microsoft Office suite. Simply put, if Office isn’t aware that you might be working with Japanese, it won’t offer the tools specifically designed for it, like Furigana. Enabling Japanese language support is more than just adding a dictionary; it activates the underlying linguistic engine that processes and displays Japanese characters correctly, making the Phonetic Guide option available for your use. It’s the foundational step that transforms your Word application into a Japanese-ready environment.
Navigating to Language Settings in Microsoft Office
The exact path to the language settings can vary slightly depending on your Microsoft Office version, but the core location remains consistent. Here’s a quick guide to help you find where to begin:
| Microsoft Office Version | Path to Language Settings |
|---|---|
| Office 365 / Microsoft 365 | File > Options > Language |
| Office 2021 | File > Options > Language |
| Office 2019 | File > Options > Language |
| Office 2016 | File > Options > Language |
| Office 2013 | File > Options > Language |
Step-by-Step: Adding and Prioritizing Japanese
Once you’ve located the Language settings, the process of enabling Japanese is straightforward. Follow these instructions carefully to ensure your Office applications are ready for Furigana.
Accessing the Language Options
- Open any Microsoft Office application (Word, Excel, PowerPoint, etc.).
- Click on File in the top-left corner.
- Select Options from the menu that appears on the left. This will open the
Word Options(orExcel Options, etc.) dialog box. - In the options dialog, click on Language in the left-hand navigation pane.
Adding Japanese to Your Office Languages
Under the Office authoring languages and proofing section, you’ll see a list of languages.
- Click the Add a Language… button.
- Scroll through the list or use the search bar to find Japanese (日本).
- Select Japanese (日本) and click Add.
- Note: If you see "Proofing available" next to Japanese, it means you can also install proofing tools (spell check, grammar), which is recommended for full functionality but not strictly required for Furigana.
Setting Japanese as Your Preferred Editing Language
For the Phonetic Guide to reliably appear, Japanese should be set as an editing language. While it doesn’t always need to be your default language, it must be recognized as an active authoring language.
- In the
Office authoring languages and proofinglist, locate Japanese (日本). - Select it and click the Set as Preferred button. This action moves Japanese to the top of the list, indicating it’s your primary editing language. Don’t worry, this won’t change your display language if you’ve set another language for the Office interface.
- Alternatively, simply ensuring it’s in the list of "proofing available" languages is often sufficient for the Phonetic Guide to appear.
The All-Important Reboot: Ensuring Changes Take Effect
Crucially, after making any changes to your Microsoft Office language settings, you must close and restart all Microsoft Office applications (including Word, Excel, Outlook, etc.) for the changes to fully take effect. Simply closing the Options dialog box is not enough. This restart allows the applications to reload with the new language configurations, properly initializing the necessary tools and features, including the Phonetic Guide.
With your Microsoft Office suite now fully configured to support Japanese, the path is clear to uncover the exact location of the Phonetic Guide within Word itself.
Having successfully laid the groundwork by enabling Japanese language support within Microsoft Office, many users still find themselves searching for the next crucial step: how to actually apply Furigana.
The Map to Clarity: Pinpointing the Phonetic Guide in Microsoft Word
The journey to adding Furigana to your Japanese text in Microsoft Word often begins with a common frustration: even after installing language packs and setting preferences, the immediate functionality isn’t always apparent. You know the capability exists, but where is the button, the control panel, the secret switch that brings it all to life? This section unearths that precise location, guiding you directly to the Phonetic Guide button, the gateway to Japanese phonetic annotations.
The Persistent Puzzle: Where is Furigana?
It’s a frequent scenario: you’ve diligently followed the steps to enable Japanese language support, expecting a new menu item or an obvious "Add Furigana" button to appear. Yet, after typing or pasting Japanese Kanji, the desired functionality seems elusive. This isn’t an oversight in the software; rather, it’s a specific design choice that makes the Phonetic Guide appear only under particular conditions, which can initially mislead users.
Unveiling the Phonetic Guide Button
The key to beginning your Furigana journey lies with the "Phonetic Guide" button, a deceptively simple icon tucked away on the Word ribbon. Understanding its location and, crucially, its activation trigger, is the primary secret to unlocking this powerful feature.
Locating Your Target
The Phonetic Guide button resides in a consistent spot within Microsoft Word’s interface:
- Tab: Navigate to the
Hometab on the Word ribbon. - Group: Look within the
Paragraphgroup. This group typically houses options like alignment, bullet points, numbering, and line spacing.
The button itself often features a subtle あ亜 icon or a similar character pairing, sometimes accompanied by a small downward arrow, signifying its text-formatting function.
The Key to Activation: Selecting Kanji
Perhaps the most significant ‘secret’ to finding the Phonetic Guide button is that it is not always active. It typically appears ‘greyed out’ or inactive by default. This changes only when Microsoft Word detects a specific type of text selection:
- Requirement: The Phonetic Guide button only becomes active or ‘un-greyed’ when you have explicitly selected Japanese text that contains Kanji.
- Why?: This intelligent design ensures the feature is only available when relevant. If you select Hiragana, Katakana, or non-Japanese text, the button will remain inactive, as Furigana is specifically for annotating Kanji.
This pivotal condition is often the stumbling block for users who have enabled Japanese language support but still can’t find the tool they need. The act of selecting Kanji is the trigger that brings the Phonetic Guide button to life.
Your Visual Compass: Finding the Phonetic Guide
To provide a precise visual guide for locating the Phonetic Guide button, refer to the following step-by-step instructions. Imagine these steps as corresponding to a sequence of screenshots in an instructional manual.
| Step | Action/Observation | Conceptual Visual Guide/Screenshot Description |
|---|---|---|
| 1 | Open Microsoft Word and ensure Japanese language support is enabled. | Imagine a standard Microsoft Word document window, perhaps with some placeholder Japanese text. |
| 2 | Type or paste Japanese text that includes Kanji (e.g., "日本語" or "漢字"). | Imagine the word "日本語" clearly visible within the document, typed in a standard font. |
| 3 | Select the specific Kanji for which you intend to add Furigana. | Imagine the characters "日本" highlighted with the standard blue selection overlay. |
| 4 | With the Kanji selected, navigate your cursor to the Home Tab on the Word ribbon. | Imagine the Word ribbon across the top, with the ‘Home’ tab prominently highlighted as the active tab. |
| 5 | Look for the ‘Paragraph’ group within the Home tab. | Imagine the ‘Paragraph’ group (containing icons for alignment, line spacing, bullets, etc.) visible on the ribbon. |
| 6 | Locate the ‘Phonetic Guide’ button within the ‘Paragraph’ group. It will now be active. | Imagine the ‘Phonetic Guide’ button (often displaying ‘あ亜’ or similar) within the ‘Paragraph’ group, brightly colored and clickable, no longer greyed out. |
The First Step to Clarity
Understanding that the Phonetic Guide button is activated by selecting Kanji, and knowing its exact location on the Home tab, is the primary ‘secret’ that demystifies the process of adding Furigana in Microsoft Word. This small, often overlooked detail is the crucial starting point for transforming static Kanji into dynamically annotated text.
With the Phonetic Guide now within reach, you’re prepared to move beyond discovery and begin the dynamic process of bringing your Kanji to life with accurate Furigana.
Having successfully unearthed the Phonetic Guide button in Microsoft Word, you’re now poised to activate its full potential and bring your Kanji to life with accompanying phonetic readings.
Breathing Life into Kanji: Your Step-by-Step Guide to Activating Furigana
The ability to overlay Furigana onto Kanji characters is an invaluable feature for anyone working with Japanese text in Microsoft Word, particularly for Japanese language students seeking reading support and professionals ensuring correct pronunciation. This section will walk you through the precise steps required to generate and manage Furigana for your selected Kanji.
Selecting Your Target Kanji Text
The first critical step in activating Furigana is to identify and select the specific Kanji characters or phrases you wish to annotate. Word’s Phonetic Guide feature works directly with your selection, ensuring only the intended text receives Furigana.
- Open Your Document: Begin by opening the Microsoft Word document containing the Japanese text you wish to modify.
- Navigate to the Text: Scroll to the section of your document that contains the Kanji for which you want to generate Furigana.
- Make Your Selection:
- Single Kanji: Click and drag your mouse over a single Kanji character.
- Kanji Word or Phrase: Highlight an entire word or a sequence of Kanji characters that form a phrase. Word is designed to provide phonetic guides for complete words, making it efficient for longer selections.
- Multiple Selections: While you can apply Furigana to multiple, non-contiguous selections, it’s often more efficient to process text segment by segment for accuracy, especially when dealing with ambiguous readings.
Opening the Phonetic Guide Dialog Box
Once your desired Kanji text is highlighted, the next step is to access the dedicated Phonetic Guide dialog box, which serves as your control center for Furigana generation and editing.
- Locate the Phonetic Guide Button: As discovered in the previous section, the Phonetic Guide button is typically found within the "Home" tab of the Word ribbon, often within the "Font" or "Paragraph" group, depending on your Word version and customization. It usually appears as an "a" with small "a" characters above it, or a character like 語 with small furigana.
- Click the Button: Click on the Phonetic Guide button. This action will immediately open the "Phonetic Guide" dialog box, displaying your selected Kanji at the bottom and the automatically generated Furigana at the top.
Automatic Furigana Generation: Hiragana and Katakana
Upon opening the dialog box, Microsoft Word leverages its built-in Japanese language support to automatically generate Furigana for your selected Kanji. By default, this generation often appears in Hiragana, the most common script for Furigana. However, in certain contexts, particularly for foreign loan words written in Kanji or for stylistic reasons, Katakana may also be used.
The dialog box will present the automatically generated reading in the "Rubi text" field, positioned above the "Base text" field, which contains your original Kanji selection. This automatic generation is a powerful tool, providing quick access to the standard readings of Kanji.
Consider the following examples of how Furigana can appear in both Hiragana and Katakana for common Kanji expressions:
| Kanji | Hiragana Furigana | Katakana Furigana | Contextual Note |
|---|---|---|---|
| 日本 | にほん | ニホン | Standard reading for "Japan." Hiragana is default. |
| 東京 | とうきょう | トーキョー | Standard reading for "Tokyo." Hiragana is default. |
| 勉強 | べんきょう | ベンキョー | Standard reading for "study." Hiragana is default. |
| 珈琲 | コーヒー | コーヒー | Kanji for "coffee" (loanword), often read in Katakana. |
| 亜米利加 | アメリカ | アメリカ | Kanji for "America" (loanword), typically Katakana. |
Customizing Readings for Precision
While Word’s automatic Furigana generation is highly accurate, Japanese language is rich with nuances, including multiple readings for a single Kanji (jukujikun, nanori, or irregular readings) or specific pronunciations required for names. This is where the manual editing feature becomes indispensable for Japanese language students and professionals.
- Review the Generated Furigana: Carefully examine the Furigana displayed in the "Rubi text" field within the "Phonetic Guide" dialog box.
- Manually Edit: If the automatically generated Furigana does not match your desired reading (e.g., if a Kanji has an alternative common reading, or if you need a specific name reading), simply click into the "Rubi text" field.
- Input Your Desired Reading: Delete the existing Furigana and type in the correct reading using your Japanese input method editor (IME). You can enter readings in either Hiragana or Katakana as appropriate for your context. For example, if Word generates にほん for 日本 but you require にっぽん, you can make that direct change.
- Adjust Alignment and Offset (Optional): The dialog box also offers options for "Alignment" and "Offset" which control the positioning of the Furigana above the Kanji. While these are primarily customization features, a slight adjustment might be necessary if the default positioning isn’t ideal for your document’s layout.
Applying Furigana to Your Text
Once you are satisfied with the generated or manually edited Furigana, the final step is to apply it to your selected Kanji text.
- Confirm Settings: Double-check that the "Rubi text" field contains the correct Furigana you wish to apply.
- Click "OK": Click the "OK" button at the bottom of the "Phonetic Guide" dialog box.
- Furigana Application: The dialog box will close, and the generated or edited Furigana will now appear directly above the corresponding Kanji in your document, seamlessly integrated with your text.
With your Furigana now applied, you might find yourself wanting to refine its appearance and positioning, a level of customization we’ll delve into in the next section.
Having learned how to activate furigana and bring your kanji to life, the next step empowers you to fine-tune its appearance, making it an even more effective tool for your Japanese studies.
Taking the Reins: Mastering Furigana Settings for Personalized Japanese Study
The ability to display furigana is incredibly powerful, but its true potential for Japanese language students lies in customization. The default settings might be sufficient for casual reading, but for creating targeted study materials, improving readability, or simply aligning it with your personal learning style, delving into the Phonetic Guide dialog box is essential. This section will guide you through the various options available, transforming you from a passive furigana user into an active architect of your learning text.
Exploring the Phonetic Guide Dialog Box
Once you’ve applied furigana to your Japanese text (as discussed in Secret 3), the Phonetic Guide dialog box becomes your control panel for fine-tuning. Typically accessed through a dedicated button on your word processor’s toolbar (often labeled "Phonetic Guide" or similar, usually found in the "Font" or "Paragraph" section), this window presents several customizable parameters. These options allow you to adjust how the furigana appears relative to its base kanji, ensuring it serves your specific learning needs.
Precision in Placement: Adjusting Furigana Alignment
One of the most impactful settings for the visual presentation of furigana is its alignment relative to the base kanji. The Phonetic Guide typically offers a few options that dictate how the phonetic characters are spaced above the main text.
- 2:1 Alignment: This setting attempts to align two furigana characters with one kanji character, distributing the furigana evenly over the base text. This is often the most precise option for showing a direct phonetic mapping, especially for single-kanji words or when you want a clear one-to-one (or two-to-one) correspondence. It can make the furigana appear more spread out.
- Center Alignment: As the name suggests, this option centers the entire furigana reading above the entire kanji string it corresponds to. This often results in a cleaner, more aesthetically pleasing look, especially for multi-kanji words or phrases where precise character-by-character alignment isn’t the primary goal. The furigana block is centered over the kanji block.
- Left Alignment: This option aligns the furigana reading to the left edge of the kanji string. While less common for standard Japanese text display, it can be useful in specific formatting scenarios or when you want the furigana to start directly above the first kanji character.
Student Tip: For beginners focusing on individual kanji readings, 2:1 alignment can be very helpful for visual association. For intermediate to advanced learners creating practice sheets where aesthetics and overall readability are key, Center alignment often provides a more natural look.
Enhancing Readability: Customizing Font Size and Style
The visual clarity of furigana is paramount for effective study. The Phonetic Guide dialog box allows you to change both the font size and style (typeface) of the furigana characters independently of the main text.
- Sizing Up Your Furigana: You can adjust the font size of the furigana characters using a numerical input, typically measured in points. Making furigana larger can significantly enhance readability, particularly for:
- Beginners: Who are still familiarizing themselves with hiragana/katakana and need clear visual cues.
- Students with visual impairments: Or those who simply prefer larger text for comfort.
- Creating flashcards: Where large, clear text is crucial for quick recognition.
- Styling Your Phonetics: The dialog box also allows you to select a different font style (e.g., Arial, Yu Gothic, Times New Roman) for the furigana. While the default font is often suitable, choosing a clear, sans-serif font can improve legibility.
- Consistency: For study materials, maintaining a consistent furigana font throughout your documents can reduce visual clutter and aid retention.
- Clarity: Some fonts are simply clearer for smaller text, which is often the case with furigana.
Controlling the Distance: Understanding and Modifying the Offset Value
The Offset value determines the vertical distance between the base kanji text and its corresponding furigana. This seemingly small detail can have a big impact on the overall appearance and utility of your text.
- Adjusting the Offset Value: The offset is usually controlled by a numerical input, often in points, where a higher value increases the distance and a lower value (or even negative value in some software) decreases it.
- Practical Uses for Students:
- Preventing Overlap: If you frequently underline your kanji or add notes directly below them, increasing the offset can provide more space, preventing the furigana from clashing with other annotations.
- Creating Space for Manual Notes: For printed study sheets, a slightly increased offset can leave a small, subtle gap where you might manually write an alternative reading or a brief definition.
- Compact Display: Conversely, a smaller offset can make the furigana appear more integrated and compact, useful when screen real estate is limited or for advanced students who don’t need the extra visual separation.
Optimal Settings for Japanese Language Students
The "best" settings are subjective and depend on your proficiency level, learning goals, and personal preferences. However, here are some tips for selecting optimal settings when creating study materials or practice sheets:
- For Beginners (N5-N4):
- Alignment:
2:1for precise character mapping. - Font Size: Larger (e.g., 8-10pt) for easy readability of hiragana/katakana.
- Offset: Slightly increased to create visual separation and prevent overlap with other study aids.
- Font Style: A clear, simple sans-serif font (e.g., Arial, Helvetica) for maximum legibility.
- Alignment:
- For Intermediate Learners (N3-N2):
- Alignment:
Centerfor a cleaner look, as you’re likely focusing on entire word readings. - Font Size: Moderate (e.g., 6-7pt) to maintain readability without overwhelming the main text.
- Offset: Default or slightly reduced for a more integrated appearance.
- Font Style: Maintain clarity, but you might experiment with fonts that match the main text for aesthetic consistency.
- Alignment:
- For Advanced Learners (N1 and beyond):
- Alignment:
Centeror even no furigana by default, only activating it for obscure words. - Font Size: Smaller (e.g., 5-6pt) as furigana is more for occasional reference.
- Offset: Default or slightly reduced for a compact, professional look.
- Font Style: Often matched to the main text for seamless integration.
- Alignment:
Customizable Furigana Options at a Glance
| Option | Description | Effect on Display | Student Tip/Consideration |
|---|---|---|---|
| Alignment | Controls how furigana characters are spaced relative to their base kanji. | 2:1: Spreads furigana characters evenly. Center: Centers the furigana string over the kanji string. Left: Aligns furigana to the left edge of the kanji string. |
2:1 is ideal for beginners needing precise, character-by-character readings. Center is often preferred for cleaner, more natural-looking text, especially for multi-kanji words. |
| Font Size | Numerical value (e.g., points) that determines the height of the furigana characters. | Increases or decreases the overall size of the furigana. | Larger sizes (8-10pt) are excellent for beginners, visual clarity, or flashcards. Smaller sizes (5-7pt) are suitable for advanced learners or when space is limited. Adjust for your comfort and learning stage. |
| Offset | Controls the vertical distance between the furigana and the main kanji text. | Increases or decreases the gap between the furigana and the kanji. | Increase the offset to prevent overlap with underlines, annotations, or to create space for manual notes. Decrease it for a more compact and integrated appearance. Useful for printed materials or digital texts where clarity of notes is important. |
| Font Style | Allows selection of a different typeface (e.g., Arial, Yu Gothic) for the furigana characters. | Changes the visual appearance of the furigana characters. | Choose clear, legible sans-serif fonts for optimal readability, especially at smaller sizes. Maintain consistency in font style across your study materials to reduce visual fatigue and aid quick recognition. |
With these customization tools at your command, you’re well-equipped to create highly effective study materials, but the journey doesn’t end here; let’s explore advanced applications and common troubleshooting tips.
Having mastered the customization of Furigana settings for specific learning needs, it’s time to elevate your expertise and tackle the more intricate aspects of its application, ensuring your documents meet professional standards.
Beyond the Basics: Troubleshooting Furigana’s Tricky Spots and Mastering Professional Workflows
As you move from student exercises to professional document creation, the demands on your Furigana application grow. This section delves into advanced strategies for Japanese language professionals, offering solutions to common issues and techniques for optimizing your workflow, ensuring precision and consistency across all your projects.
Troubleshooting Common Furigana Issues
Even with the correct settings, Furigana can sometimes be elusive. Here’s a guide to diagnosing and resolving the most frequent problems you might encounter.
What to Do If Furigana Doesn’t Appear
If you’ve followed the previous steps for activating Furigana but it still doesn’t display, consider these points:
- Language Settings: Double-check that Microsoft Word’s editing language for the document (or the specific text) is set to Japanese. Go to
File > Options > Language, ensure Japanese is listed under "Office authoring languages and proofing" and set as preferred. - Font Compatibility: Some non-standard or highly stylized fonts may not correctly support Furigana display, or they might render it in a way that makes it seem absent. Try changing the text to a common Japanese font like
Yu GothicorMS Minchoto test if Furigana appears. - Hidden Text: Occasionally, Furigana might be applied but hidden due to formatting. Check
Home tab > Font group > Font Dialog Box Launcher (small arrow) > Font tab. Ensure the "Hidden" checkbox is not ticked. - Document Corruption: For persistent issues with a specific document, try copying the problematic text into a new, blank Word document. Sometimes, document corruption can interfere with features.
The Phonetic Guide Button Remains Greyed Out
This is a common frustration, indicating Word doesn’t recognize the selected text as Japanese or suitable for Furigana.
- Language Recognition: The most common reason is that Word doesn’t detect the language of your selected text as Japanese. Select the text, go to
Review tab > Language group > Language > Set Proofing Language. Ensure "Japanese" is selected and "Do not check spelling or grammar" is not checked. - Input Method Editor (IME) Status: Although less common, ensure your Japanese IME (e.g., Microsoft IME) is installed and active on your system. Word often uses IME components for language processing.
- Selection Type: Ensure you are selecting actual Japanese characters. The Phonetic Guide cannot be applied to images, text boxes that aren’t properly linked to the main text layer, or non-Japanese characters.
To summarize common troubleshooting scenarios, refer to the table below:
| Problem | Potential Cause | Solution Steps |
|---|---|---|
| Furigana doesn’t show after application. | Incorrect language settings for text. | Select text, Review > Language > Set Proofing Language, choose Japanese. |
| Font incompatibility. | Change font to a standard Japanese font (e.g., Yu Gothic, MS Mincho). | |
| Furigana applied but text is hidden. | Check Font Dialog Box (Ctrl+D), ensure "Hidden" is unticked. |
|
| Phonetic Guide button is greyed out. | Word doesn’t recognize text as Japanese. | Select text, Review > Language > Set Proofing Language, choose Japanese. |
| Text is within a non-editable element (e.g., image). | Ensure you’re selecting editable Japanese text in the main document body. | |
| Incorrect Furigana is generated. | Word’s automatic recognition is flawed. | Manually edit Furigana in the Phonetic Guide dialog box before applying. |
| Multiple readings for a kanji. | Select the specific kanji, apply Phonetic Guide, and choose the correct reading. |
Advanced Techniques for Japanese Language Professionals
Beyond basic application, professionals require efficient methods and an understanding of how Furigana interacts with other document features.
Efficiently Applying Furigana to Large Documents
For extensive texts, manually applying Furigana word by word is impractical.
- Select All and Apply: For documents where all Japanese text requires Furigana, simply select the entire document (
Ctrl+A) and then click thePhonetic Guidebutton. Word will attempt to apply Furigana to all recognized Japanese text. Review carefully afterwards. - Find and Replace with Furigana: For specific terms or names that appear repeatedly, you can use a macro or even advanced find/replace techniques (though this requires more technical expertise) to apply consistent Furigana.
- Styles and Macros: For highly structured documents, consider creating custom paragraph or character styles that automatically apply Furigana to specific text elements. For repetitive tasks, recording a simple macro to apply Furigana settings can save significant time.
Optimizing Display: Print Versus Digital Screens
How Furigana appears can vary significantly depending on the medium.
- Print Documents: In print, clarity and legibility are paramount. Ensure your chosen font pairing (main text and Furigana) provides good contrast and size. Consider slightly larger Furigana in dense texts to prevent it from blending into the main characters. Pay attention to line spacing, as tightly packed lines can make Furigana overlap.
- Digital Screens: On digital displays, especially for web or e-readers, dynamic resizing and different screen resolutions can affect appearance. Vector-based fonts generally perform better. Ensure the Furigana text is part of the character data, not just an image layer, for accessibility and proper scaling. Test on various screen sizes and zoom levels.
Integrating Furigana with Other Microsoft Word Features
Furigana can interact with Word’s collaborative tools in important ways.
- Comments: When adding comments to text that includes Furigana, the Furigana will typically remain attached to the main text. However, if you add a comment that replaces text with Furigana, the Furigana will be removed unless explicitly reapplied to the new text.
- Tracking Changes: This feature requires careful management. If "Track Changes" is active and you apply or modify Furigana, these changes will be recorded. When reviewing, accepting or rejecting a change to the main text will also affect its associated Furigana. Ensure reviewers understand that Furigana application/modification is part of the tracked changes. For clarity, sometimes it’s better to apply Furigana after all major text revisions are finalized.
Brief Mention of Character Encodings and Their Impact
Character encodings are the systems computers use to represent text characters. For Japanese, common encodings include Shift-JIS and UTF-8. While modern versions of Word primarily use Unicode (which UTF-8 falls under), older files or specific workflows might use different encodings.
- Impact on Furigana: If a document is incorrectly encoded, or if you’re dealing with very old files, Japanese characters (including the tiny Furigana) might display as garbled or "mojibake." This can prevent Furigana from being applied correctly or even from appearing at all. Always work with documents saved in a modern Unicode format (like
.docx) to ensure optimal display and functionality for Japanese characters and Furigana.
Best Practices for Document Sharing, Ensuring Consistent Furigana Display
When sharing your meticulously crafted Japanese documents, consistency is key.
- Embed Fonts: If you’ve used specific fonts that might not be common on other users’ systems, embed them in your Word document. Go to
File > Options > Saveand check "Embed fonts in the file." This ensures the recipient sees the document exactly as you intended, including Furigana rendering. - Save as PDF: For final, non-editable versions, exporting your document to PDF is the most reliable way to preserve the layout and appearance of Furigana. PDFs render text as it appears on your screen, virtually eliminating display inconsistencies across different systems.
- Communicate Settings: If the recipient needs to edit the document, advise them on any specific Word language settings or font requirements to ensure they can view and work with the Furigana accurately.
- Use Standard Fonts: Stick to widely available Japanese fonts (e.g.,
Yu Gothic,MS Mincho,Meiryo) if embedding fonts is not an option.
With these advanced insights and troubleshooting strategies, you’re now equipped to handle virtually any Furigana challenge, moving you closer to producing perfectly tailored Japanese language documents.
Having uncovered advanced tips and strategies for navigating complex Japanese language issues, we now turn our attention to mastering a fundamental feature that elevates document quality: Furigana in Microsoft Word.
Your Blueprint for Clarity: Mastering Furigana in Microsoft Word for Flawless Japanese Documents
For anyone working with Japanese text, from students meticulously dissecting grammar to professionals crafting critical documents, the ability to accurately and efficiently apply Furigana is indispensable. Microsoft Word’s Phonetic Guide feature offers a powerful, yet often underutilized, tool to achieve this. Mastering it transforms your workflow, ensuring your documents are not only linguistically precise but also exceptionally clear and accessible.
Recapping the Core Principles: Your ‘Secrets’ to Furigana Mastery
To truly leverage Furigana in Microsoft Word, it’s essential to understand and regularly practice a few core principles. These are often the ‘secrets’ that differentiate a basic user from a proficient Japanese language professional.
-
Finding the Phonetic Guide: The first step is knowing where to locate this crucial feature.
- Selection is Key: Highlight the Japanese text (Kanji or mixed script) to which you want to add Furigana.
- Accessing the Feature: Navigate to the
Hometab in Word. In theParagraphgroup, look for thePhonetic Guidebutton, often represented by the characterあnext to亜. Clicking this will open thePhonetic Guidedialog box.
-
Enabling and Initial Application: Once found, applying Furigana is straightforward, but understanding the initial settings is vital.
- Automatic Detection: Word will attempt to automatically detect the appropriate Furigana (reading) for your selected text. Review this initial suggestion carefully.
- Manual Correction: If Word’s suggestion is incorrect or you prefer an alternative reading, you can manually type or edit the Furigana in the
Rubi textfield within thePhonetic Guidedialog. This is critical for ambiguous Kanji or specific proper nouns.
-
Customizing for Precision and Aesthetics: Beyond simple application, Word offers robust customization options to ensure your Furigana meets specific layout and readability requirements.
- Font and Size: Adjust the
Rubi fontandSizeto ensure the Furigana is legible but doesn’t overpower the base text. - Alignment: Control the horizontal positioning of the Furigana relative to the base text using the
Alignmentoptions (e.g.,Center,Left,Right,Justify). - Offset: The
Offsetvalue dictates the vertical spacing between the base text and the Furigana. Experiment with this to find the optimal visual balance, especially for printed documents.
- Font and Size: Adjust the
-
Advanced Usage and Troubleshooting: For professionals, handling complex scenarios is paramount.
- Multiple Readings: Be prepared to manually adjust Furigana for words with multiple readings depending on context. The Phonetic Guide is a starting point, not always the final authority for nuanced texts.
- Applying to Phrases: While typically applied word-by-word, you can select longer phrases. However, manual refinement is almost always necessary to ensure each Kanji sequence has the correct corresponding Furigana.
- Removing Furigana: To remove existing Furigana, simply select the text, open the Phonetic Guide dialog, and clear the
Rubi textfield.
-
Strategic Application and Workflow Integration: The final ‘secret’ lies in integrating Furigana effectively into your document creation workflow.
- Consistency: Establish a consistent approach for when and how Furigana is applied within your documents, especially if working collaboratively.
- Review Process: Always review applied Furigana as part of your proofreading process, checking for accuracy and visual consistency.
- Keyboard Shortcuts: Explore if custom keyboard shortcuts can be assigned to the Phonetic Guide feature for faster access, saving valuable time during extensive document preparation.
The Indispensable Value of the Phonetic Guide
The Phonetic Guide feature in Microsoft Word is far more than a stylistic embellishment; it’s a critical tool that adds immense value for both learners and seasoned professionals.
For Japanese language students, it serves as an unparalleled learning aid. It provides immediate phonetic feedback, reinforcing Kanji readings and aiding in vocabulary acquisition. By actively applying and adjusting Furigana, students develop a deeper understanding of pronunciation and context, moving beyond rote memorization to true comprehension.
For Japanese language professionals, the Phonetic Guide is a cornerstone of clarity and accuracy. In technical documents, legal translations, or educational materials, precise Furigana eliminates ambiguity, prevents misinterpretation, and ensures accessibility for a wider audience, including those less familiar with specific Kanji or uncommon readings. It upholds the highest standards of professional communication.
Cultivating Proficiency: Practice Makes Perfect
Like any powerful tool, mastery of the Furigana feature in Microsoft Word comes with consistent practice. We strongly encourage you to integrate these steps into your regular document creation routine. Experiment with different texts, adjust settings, and intentionally troubleshoot common issues. The more you engage with the Phonetic Guide, the more intuitive and efficient its use will become, transforming a complex task into a seamless part of your workflow.
The Transformative Impact: Enhanced Productivity and Quality
Mastering Furigana significantly enhances productivity by streamlining a process that would otherwise be laborious and error-prone. It deepens learning by providing immediate, interactive feedback, and profoundly elevates the overall quality of Japanese language documents by ensuring clarity, accuracy, and accessibility. This proficiency empowers you to create content that communicates effectively and professionally, leaving no room for linguistic uncertainty.
With Furigana mastery under your belt, you’re well-equipped to explore even more sophisticated tools and techniques for enhancing your Japanese language proficiency and document creation.
Frequently Asked Questions About Can’t Find Furigana on Word? Here’s the Secret to Fix It
Why can’t I find the Furigana option in my version of Word?
The Furigana feature might not be directly visible or enabled by default in all versions of Microsoft Word, especially if it’s an older version or if it’s not configured for East Asian languages. You might need to adjust your language settings to properly use it.
How do I activate Furigana on Word if it’s not showing up?
To activate furigana on Word, ensure you’ve enabled East Asian languages in Word’s options. Go to File > Options > Language and add Japanese. After that, the Furigana option should become available under the "Phonetic Guide" feature.
What is the "Phonetic Guide" and how does it relate to Furigana?
The "Phonetic Guide" is the feature in Microsoft Word that allows you to add phonetic annotations to text, which is how Furigana is implemented. So, to activate furigana on Word, you’re essentially using the Phonetic Guide functionality.
Is there a specific font or language setting I need to use Furigana correctly?
Yes, you typically need a Japanese font installed and selected for the characters you want to annotate with Furigana. Also ensure that Japanese is added as an editing language in Word’s language settings when you want to activate furigana on Word.
You’ve now unlocked the 5 ‘secrets’ to mastering the Phonetic Guide in Microsoft Word! From enabling the correct language settings to customizing the perfect alignment and font size, the once-hidden power of Furigana is now firmly in your control. No more guesswork or frustration—just clear, readable Kanji.
For Japanese language students, this means creating more effective study materials. For professionals, it means producing polished, accessible documents with greater efficiency. By putting these steps into practice, you are not just adding a feature; you are fundamentally enhancing your ability to work with the Japanese language.
We encourage you to practice these techniques regularly. The more you use the Phonetic Guide, the more intuitive it will become. Go ahead and transform your Japanese language documents from challenging texts into seamless, professional-grade communications. Your journey to mastering Furigana has officially begun!
